
Please note if you are using IPBan Pro Personal edition, much of the following information is still accurate, except you won’t be dealing with multiple machines.
The IPBan Pro web admin utility is a powerful server application that all IPBan Pro Datacenter Clients connect to. This server control center serves a number of purposes, such as:
- Maintain a connection to each IPBan Pro Datacenter client, show last ping time of each client.
- Synchronize banned ip addresses amongst all clients. When an ip address is banned on one client, the client sends the ip address to the web admin utility. The web admin utility then broadcasts the ban back to all clients, who then add the ip address to the firewall.
- Synchronize the IPBan Pro API lists to all clients, namely the recent ban list, naughty ban list and any country block lists you have setup.
- Provide a clean, easy to use web interface to setup and configure IPBan Pro. No more hand editing XML files. Simply configure everything with the web interface, where each field has a handy tooltip explaining what it does.
- The web admin utility synchronizes all settings to each client regularly. By configuring just once in the web admin utility, you gain significant cost savings from having to configure each client separately.
- Mass update clients tool.
- Resource monitor for each client machine for CPU, disk, RAM, IO, etc.
For installation instructions, please visit the IPBan Pro Installer Page or download the web admin utility now.
IPBan Pro Web Admin Usage
Recent Activity
The recent activity tab is the default page for the web admin utility. In this view you can see a high level summary of activity by country, a recent banned ip address view, a recent successful login view, and a recent failed login view.

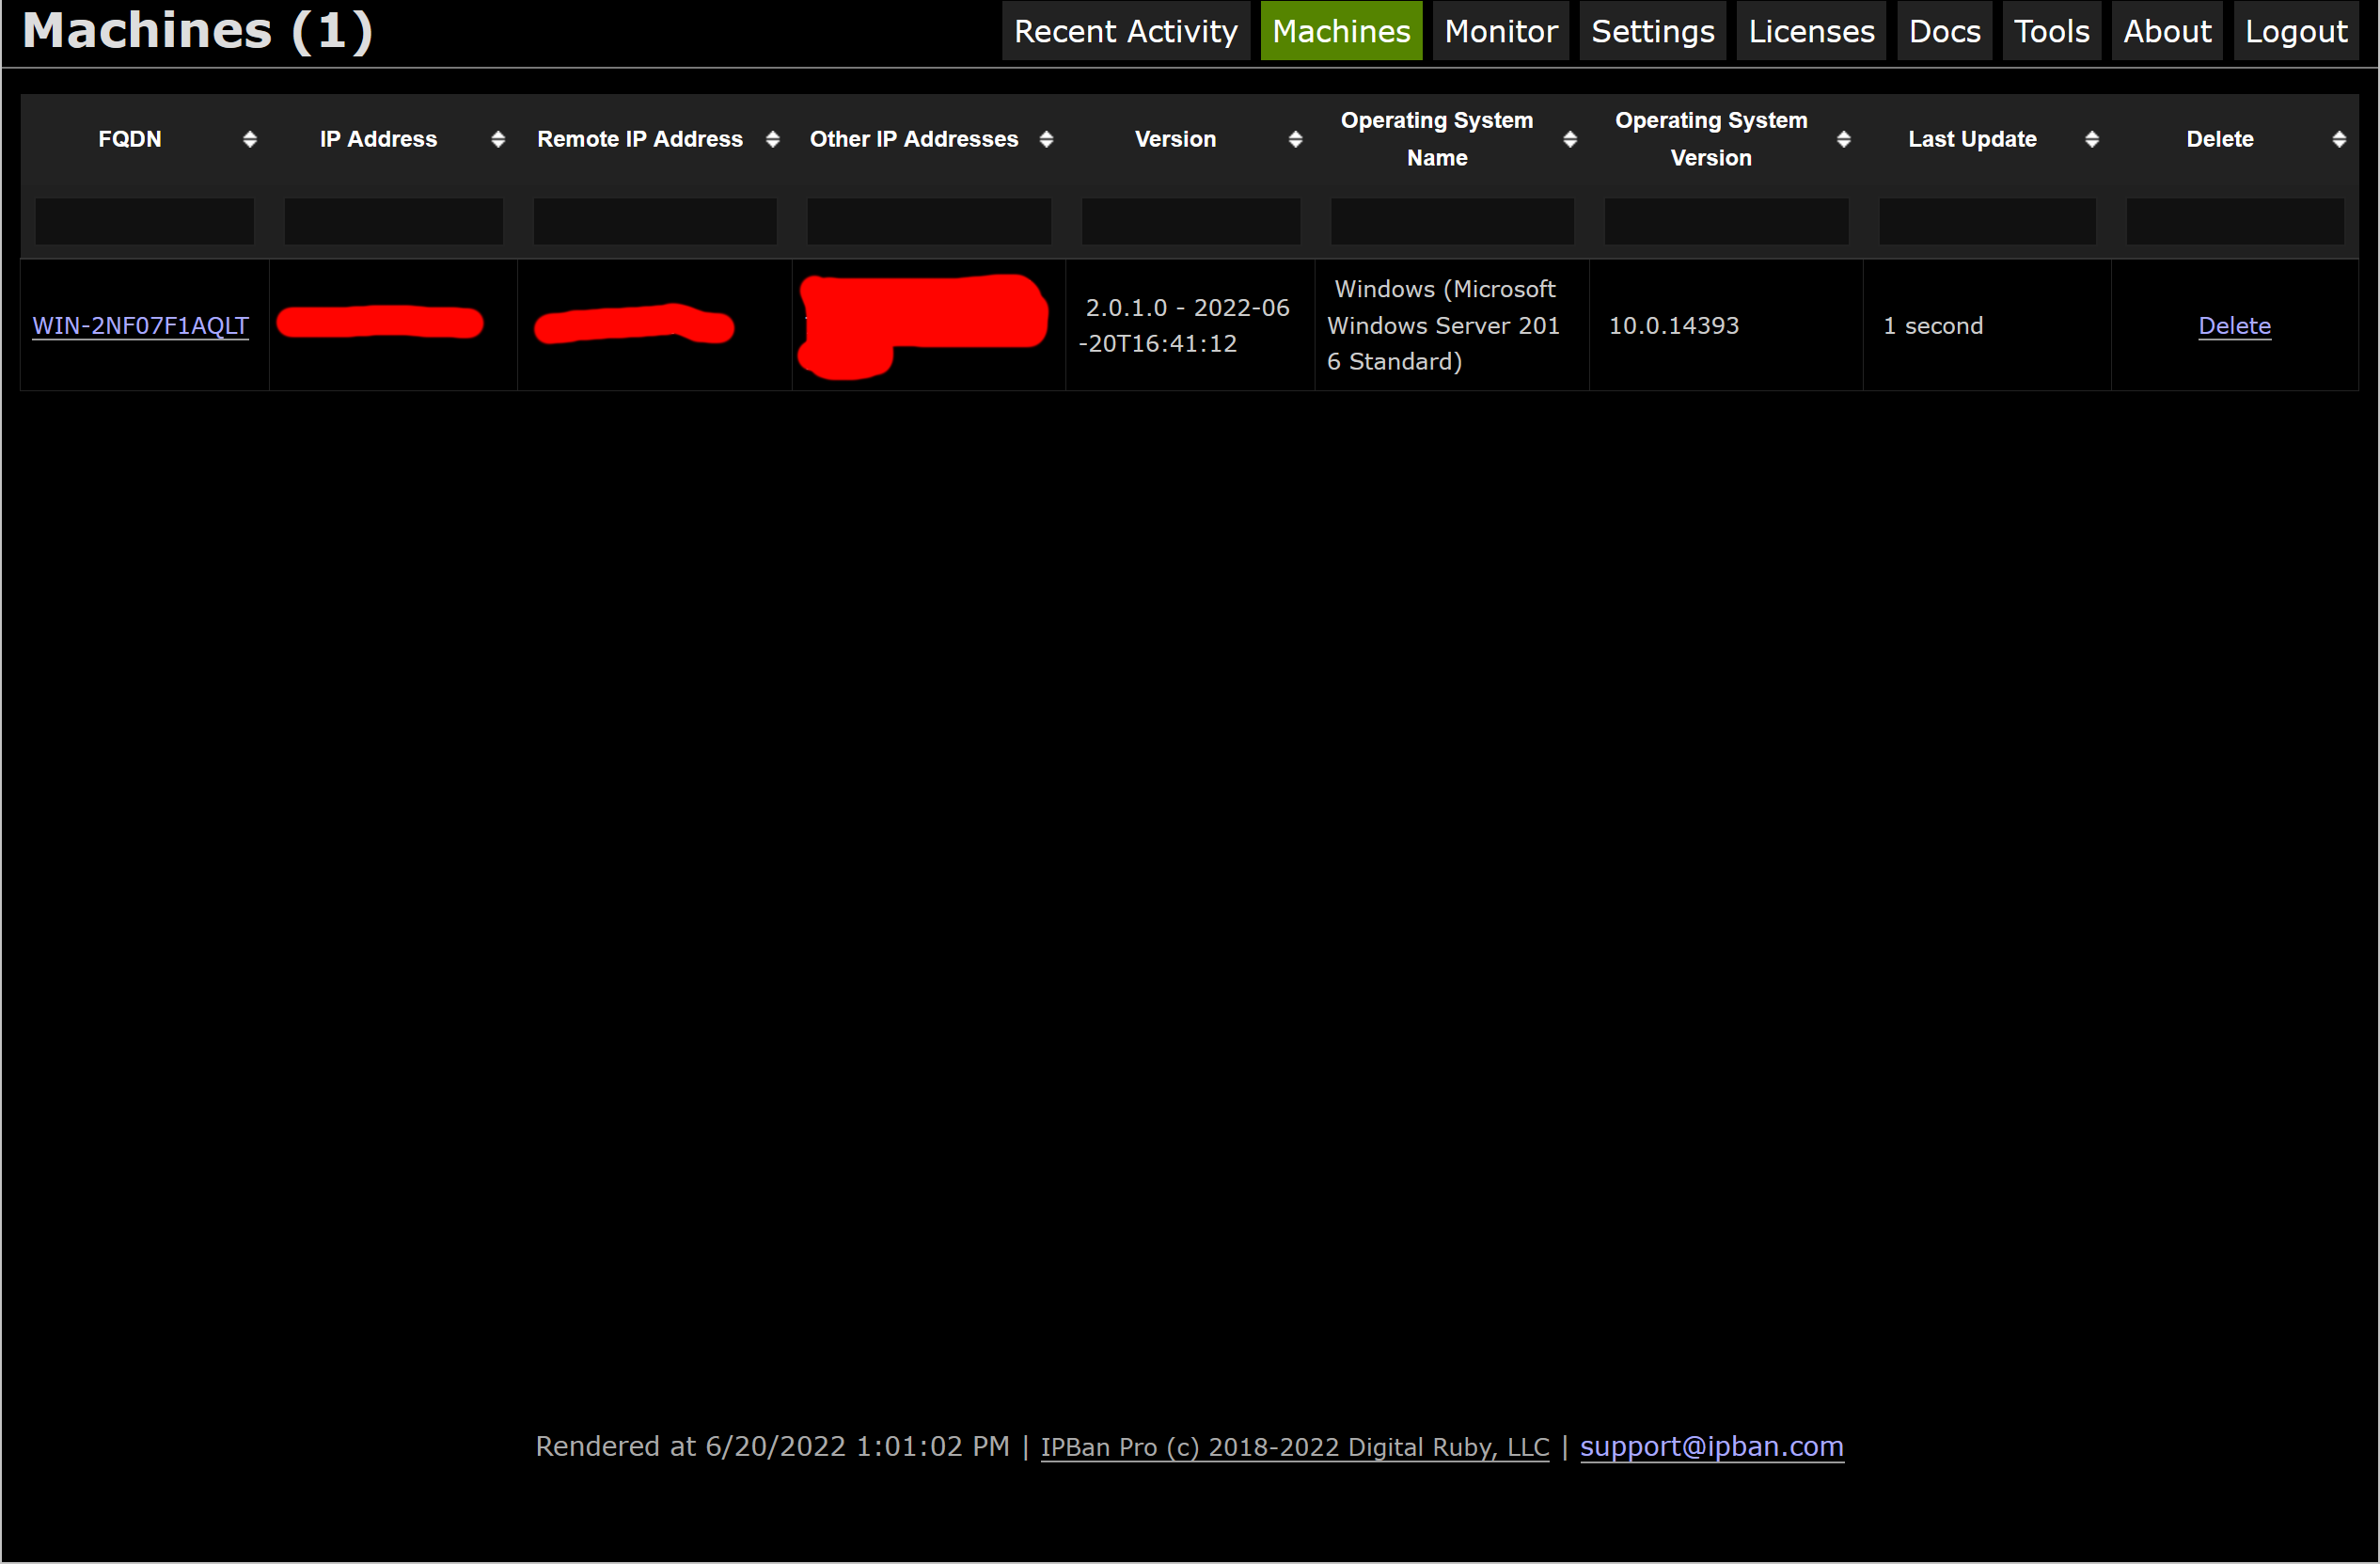
Machines
The machines tab shows a list of all connected clients, their ip addresses, fully qualified domain name, operating system name and version, and the last ping time.
Settings
The settings tab is where all configuration is done. Client configuration, IPBan Shield, notifications, log parsing, event viewer parsing and raw XML configuration can all be viewed and edited here.
It is important to click’ Save’ when you are done making settings changes, otherwise the changes will not be saved and sent to the clients.
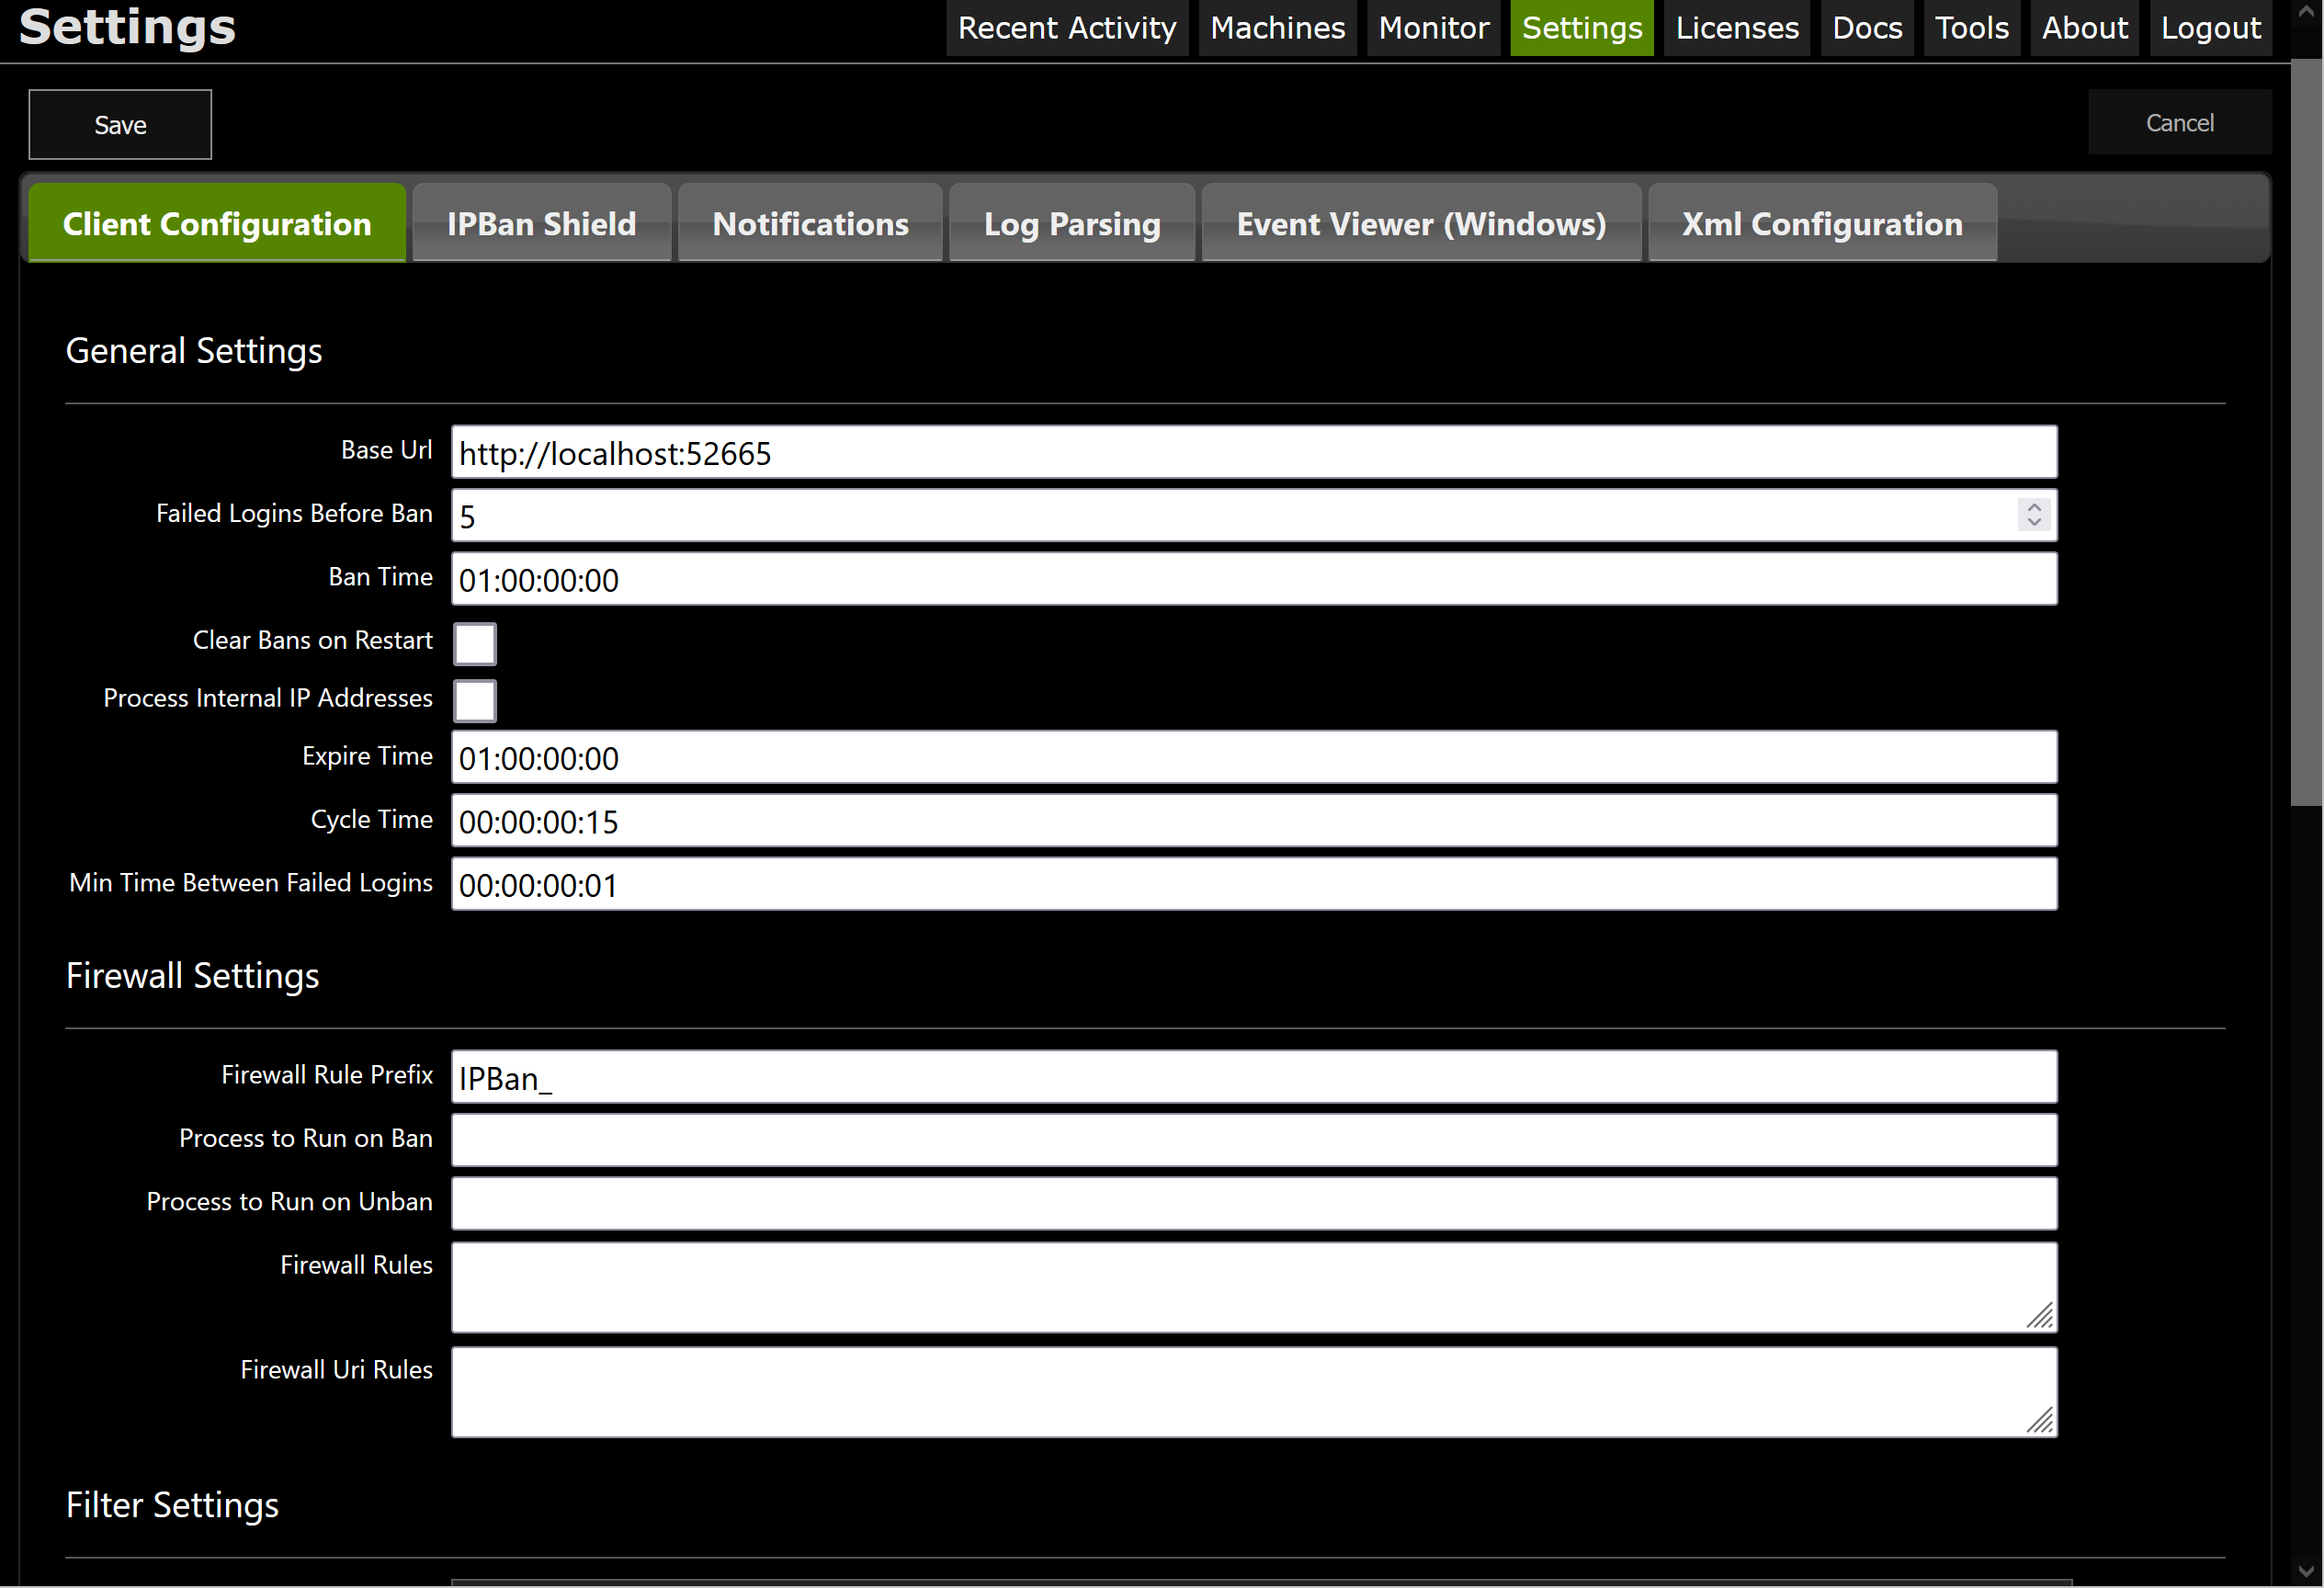
Client Configuration
The client configuration for all machines can be changed. These settings map directly to the IPBan free edition settings.
The base url can be changed on this page. Before installing any clients, ensure that your base url is the desired value. When you install each client, you’ll pass this base url as a parameter to the installer.
When editing whitelist or blacklist, you can entire Expire: prefix and then a timestamp in YYYY-MM-DDTHH:mm:SSZ format to auto-expire the entry.
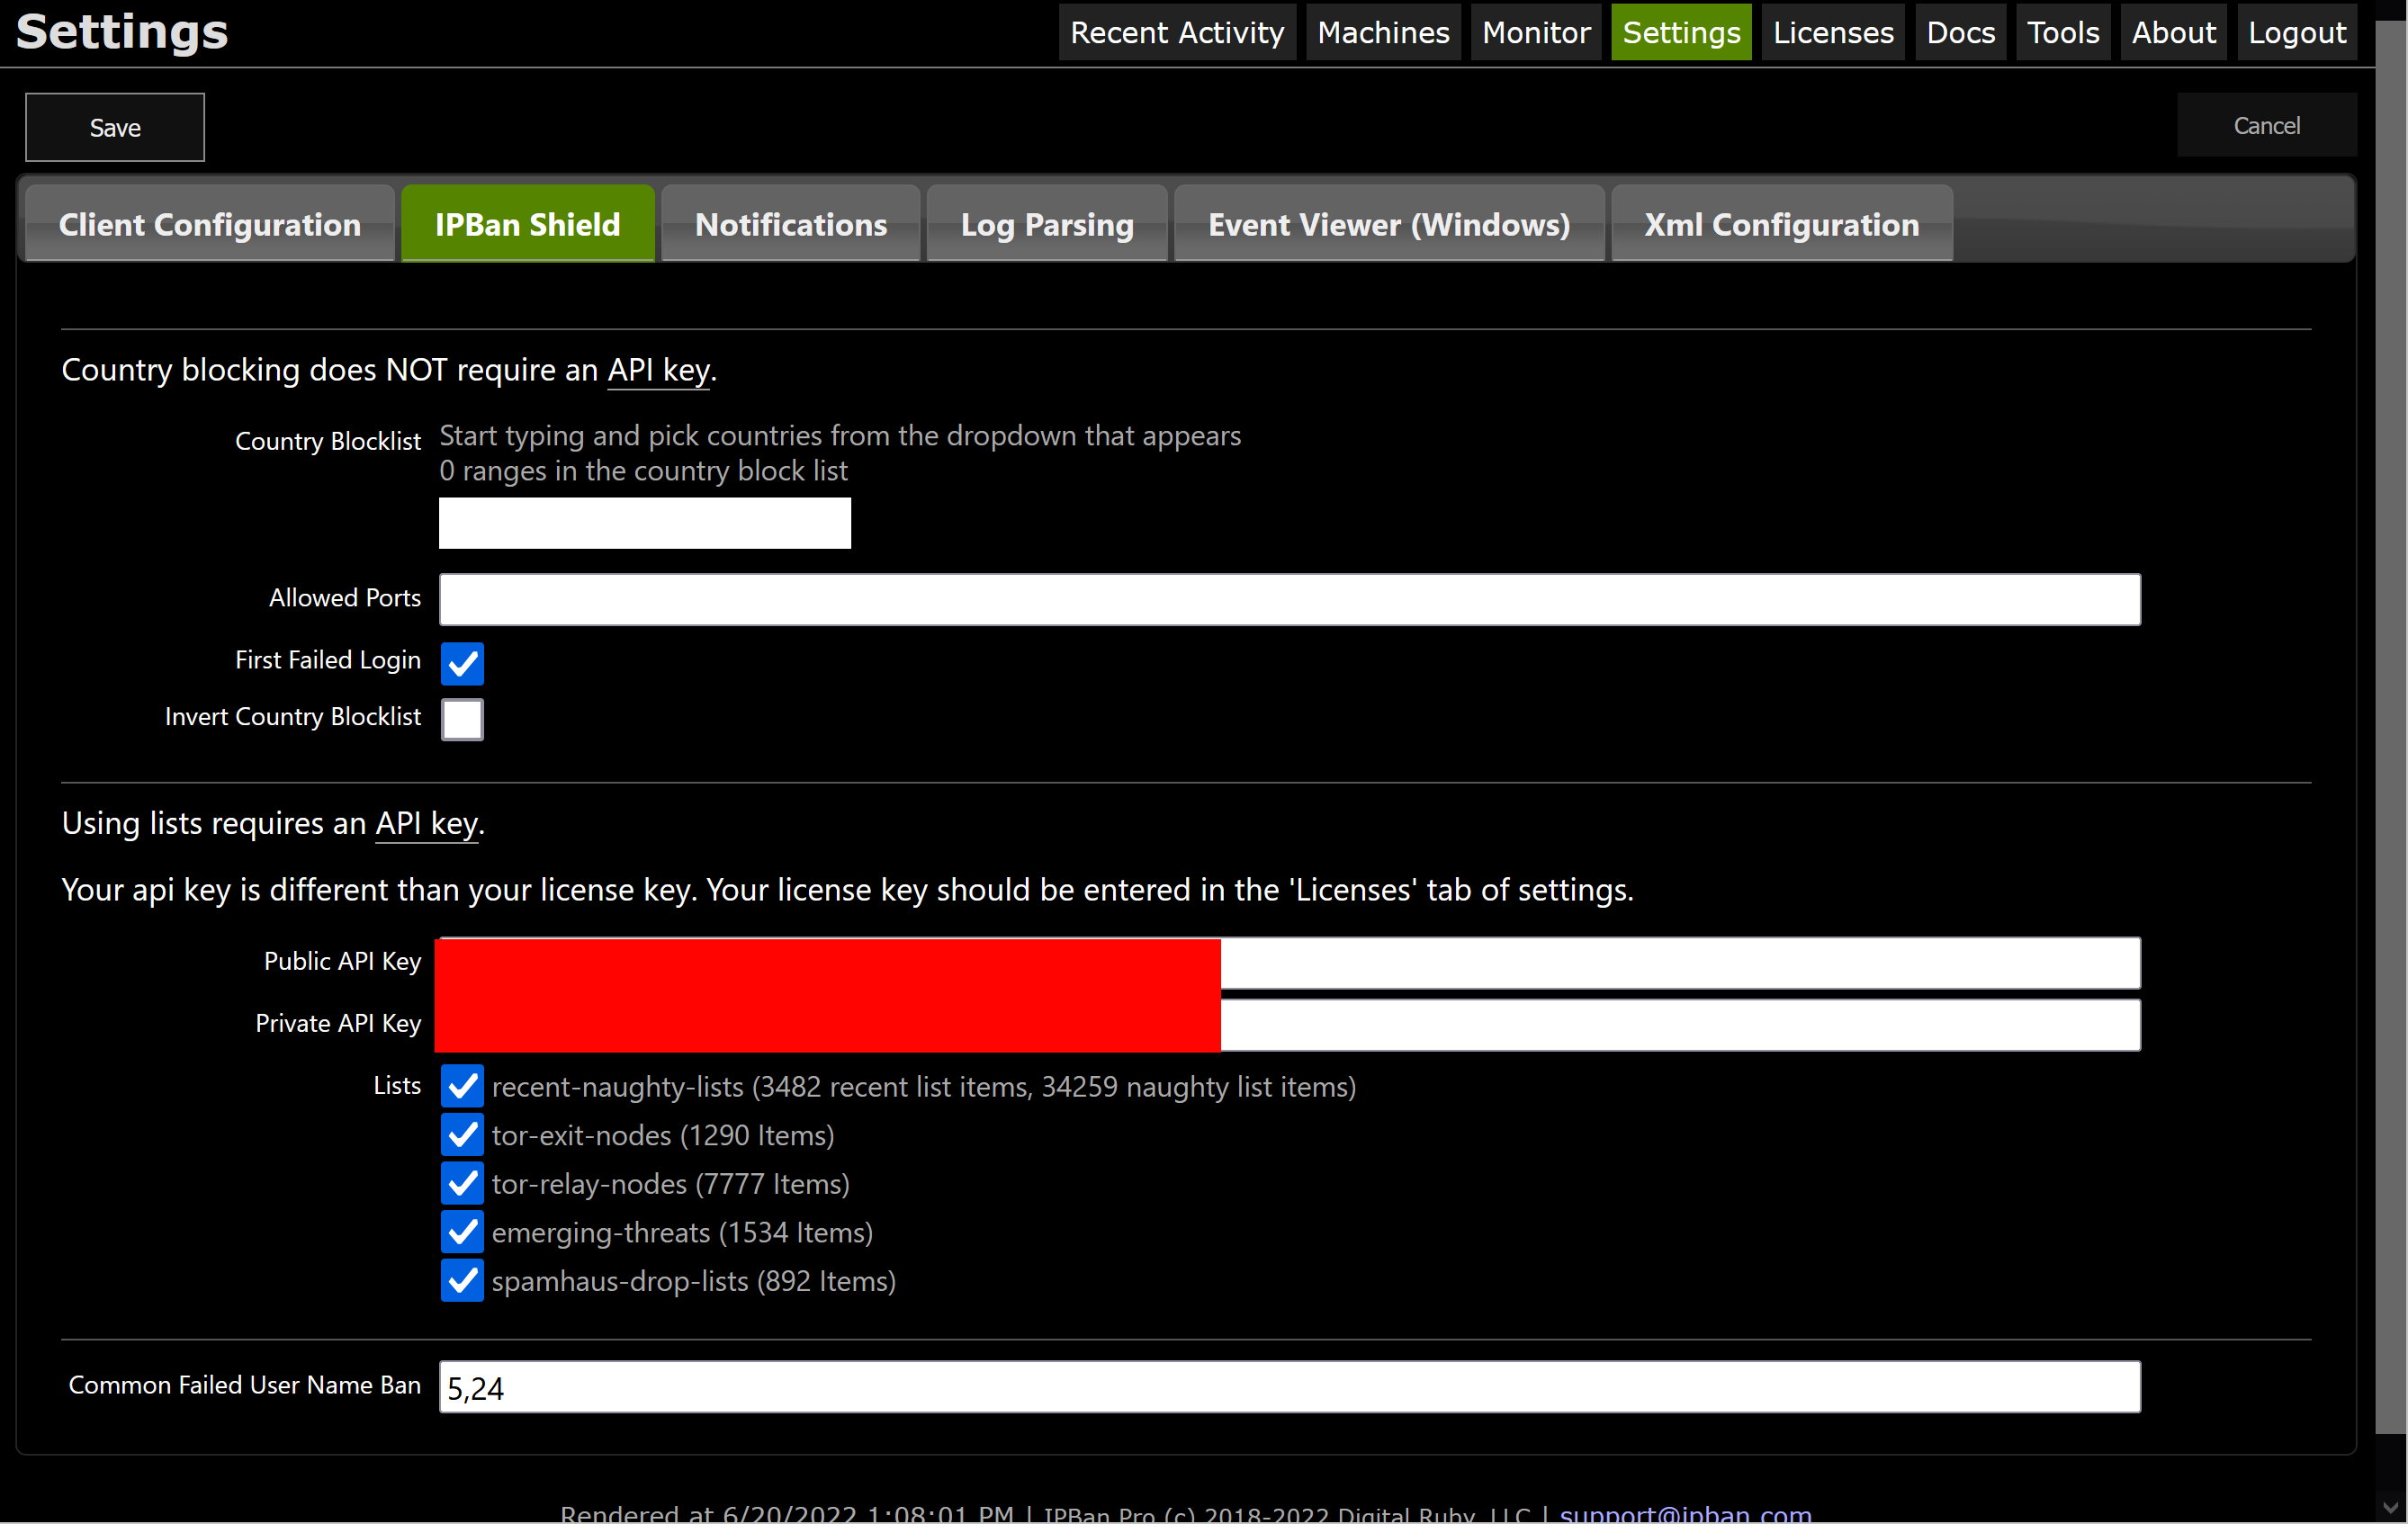
IPBan Shield
IPBan Shield maintains the country block list, recent ban list and naughty ban list and keeps each client in sync with the lists.
Ensure you have entered your public and private api key in order to use these lists, or just leave blank if you are not interested in the extra layer of protection.
Notifications
IPBan Pro can send email notifications for certain events, along with an auto email to the whois email contact for each ip address that is banned, ideally getting some Internet providers to take action against botnets and hackers.
Set your notification flags to the events you care about. Failed logins will only notify if the user name was a match on the local machine.
Setup your smtp server properties using the smtp fields. At the bottom of the notifications view is a test button where you can determine if your smtp setup is working.
You can configure the template for the notifications if desired. Simply hover over the field name to view the tooltip which will explain how to setup your template.
If you have enabled who is notifications and setup valid smtp login information, whois notifications will be sent to the owners of ip addresses that are banned to notify them their ip addresses are hacking. Whois notifications can be turned off by unchecking the who is notification option, or by setting the whois subject or body to empty.

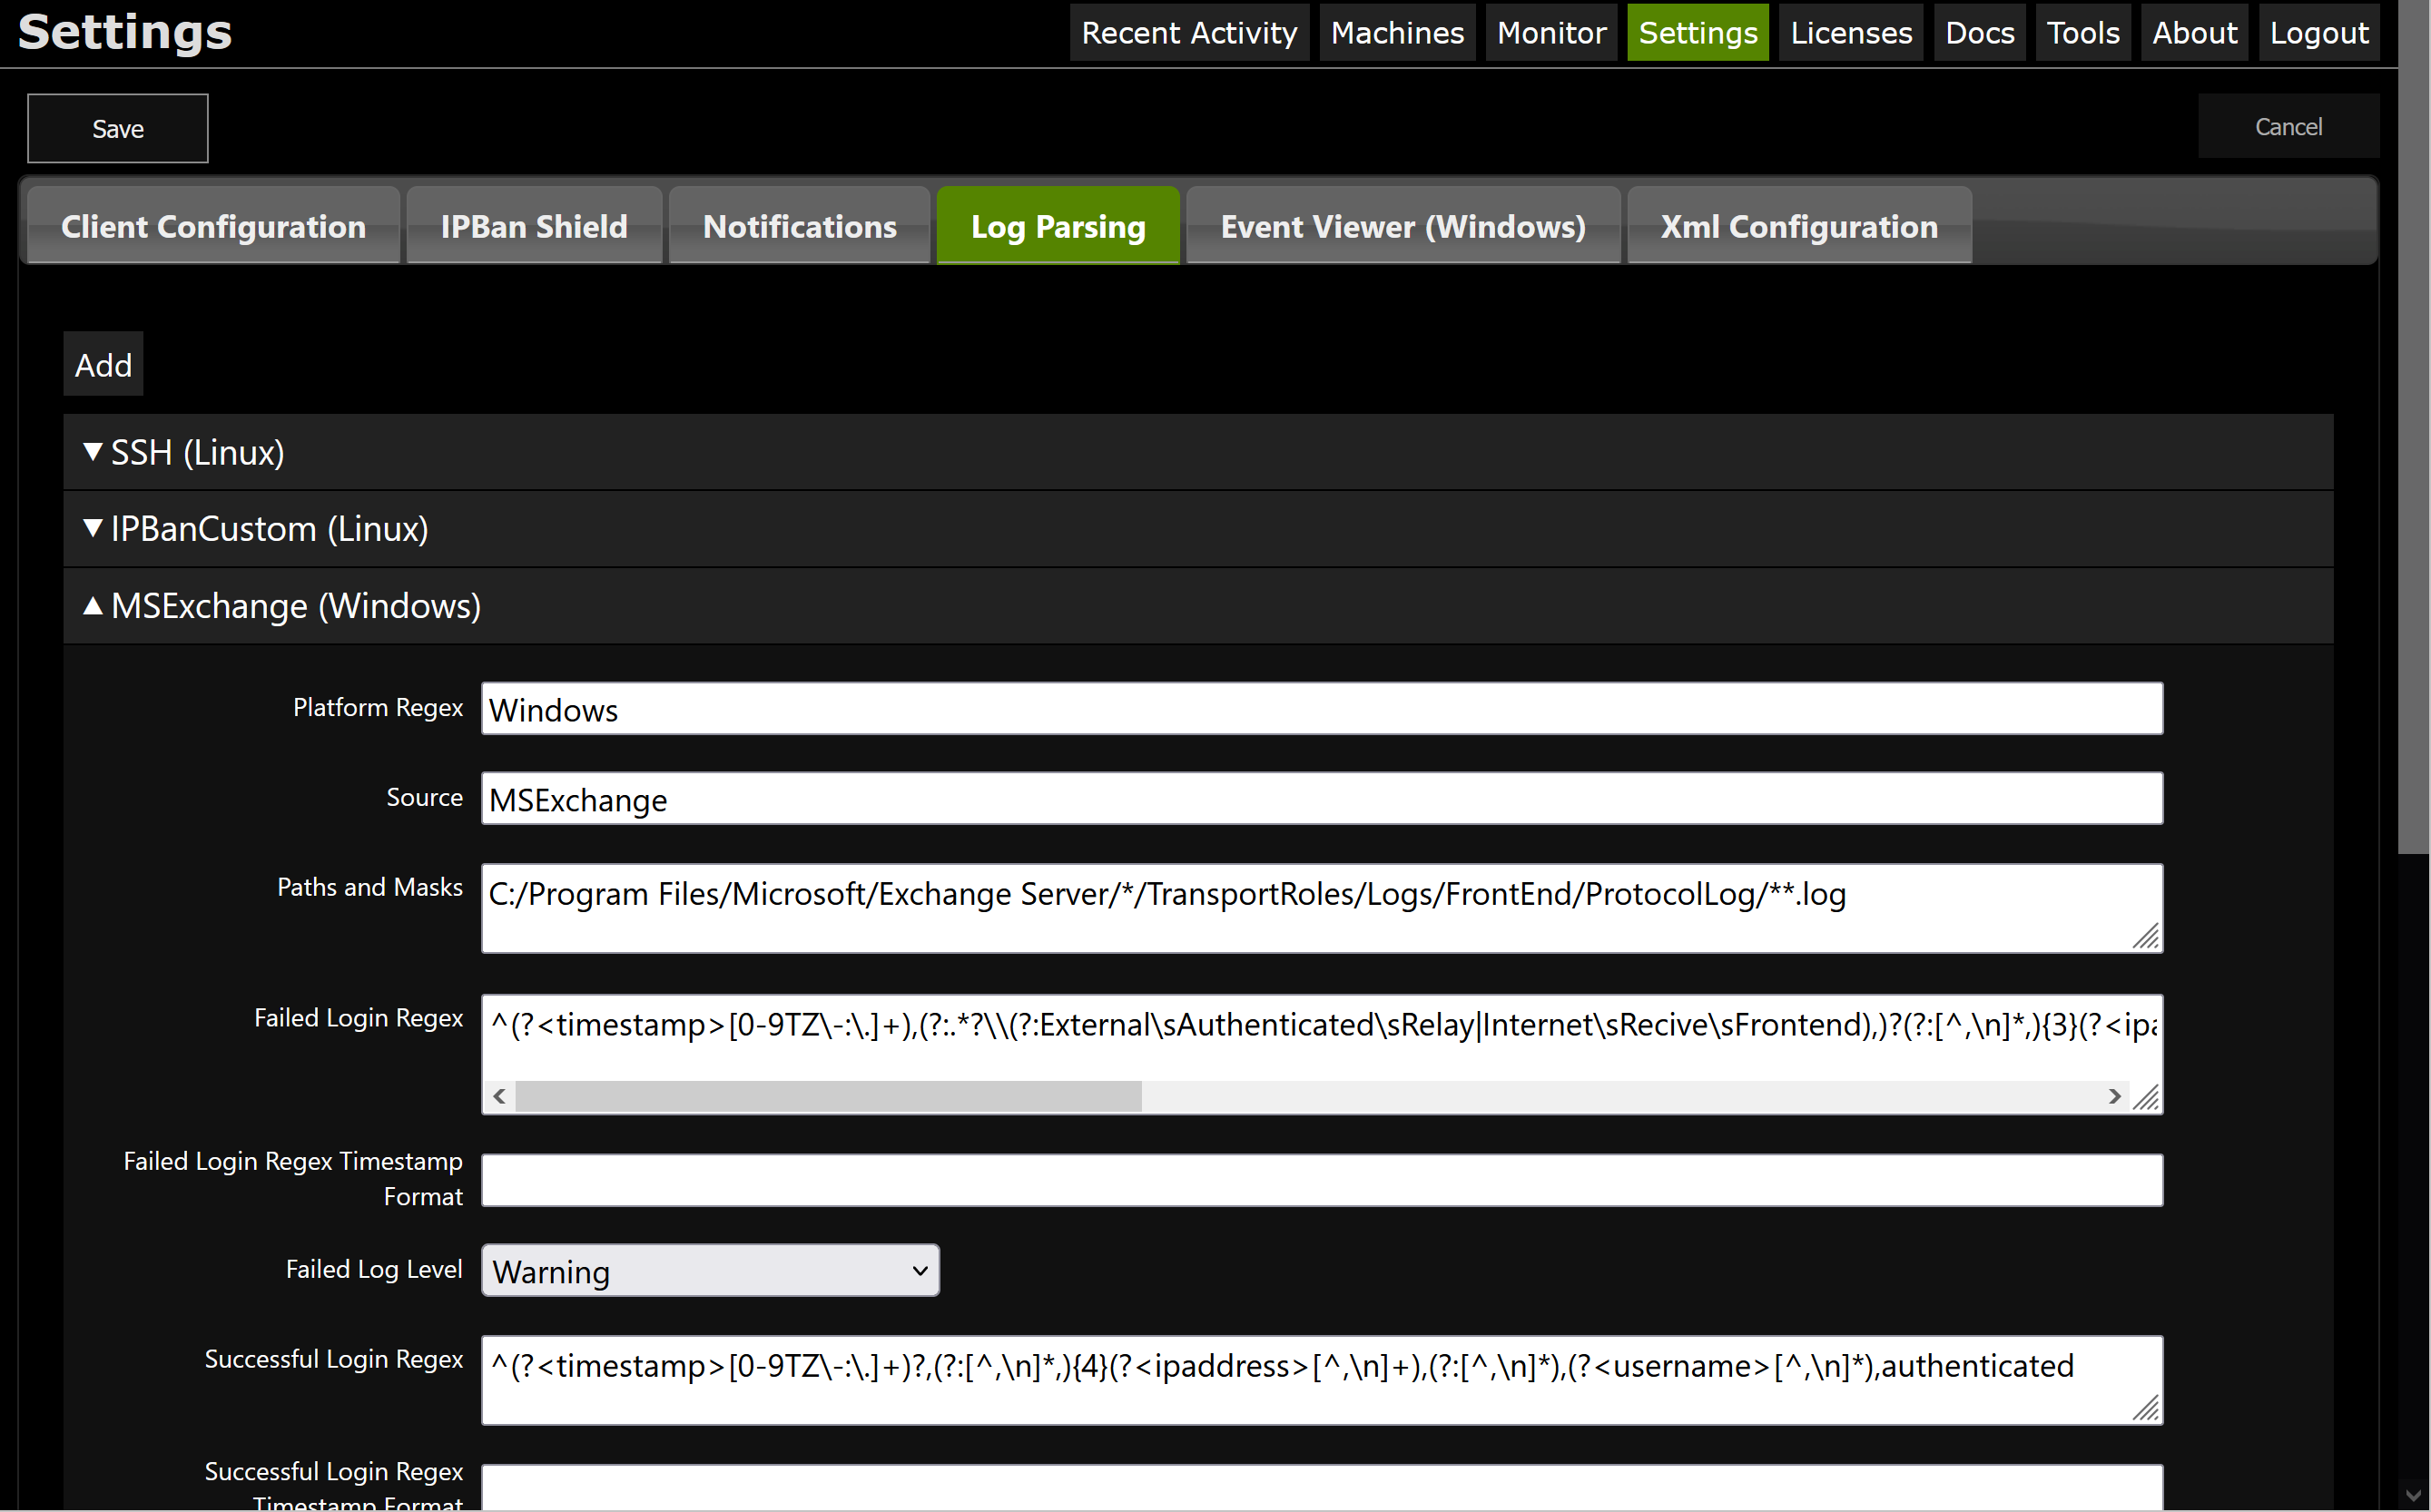
Log Parsing
Log file parsing can be configured and works just like in the free IPBan version. See the LogFilesToParse element.
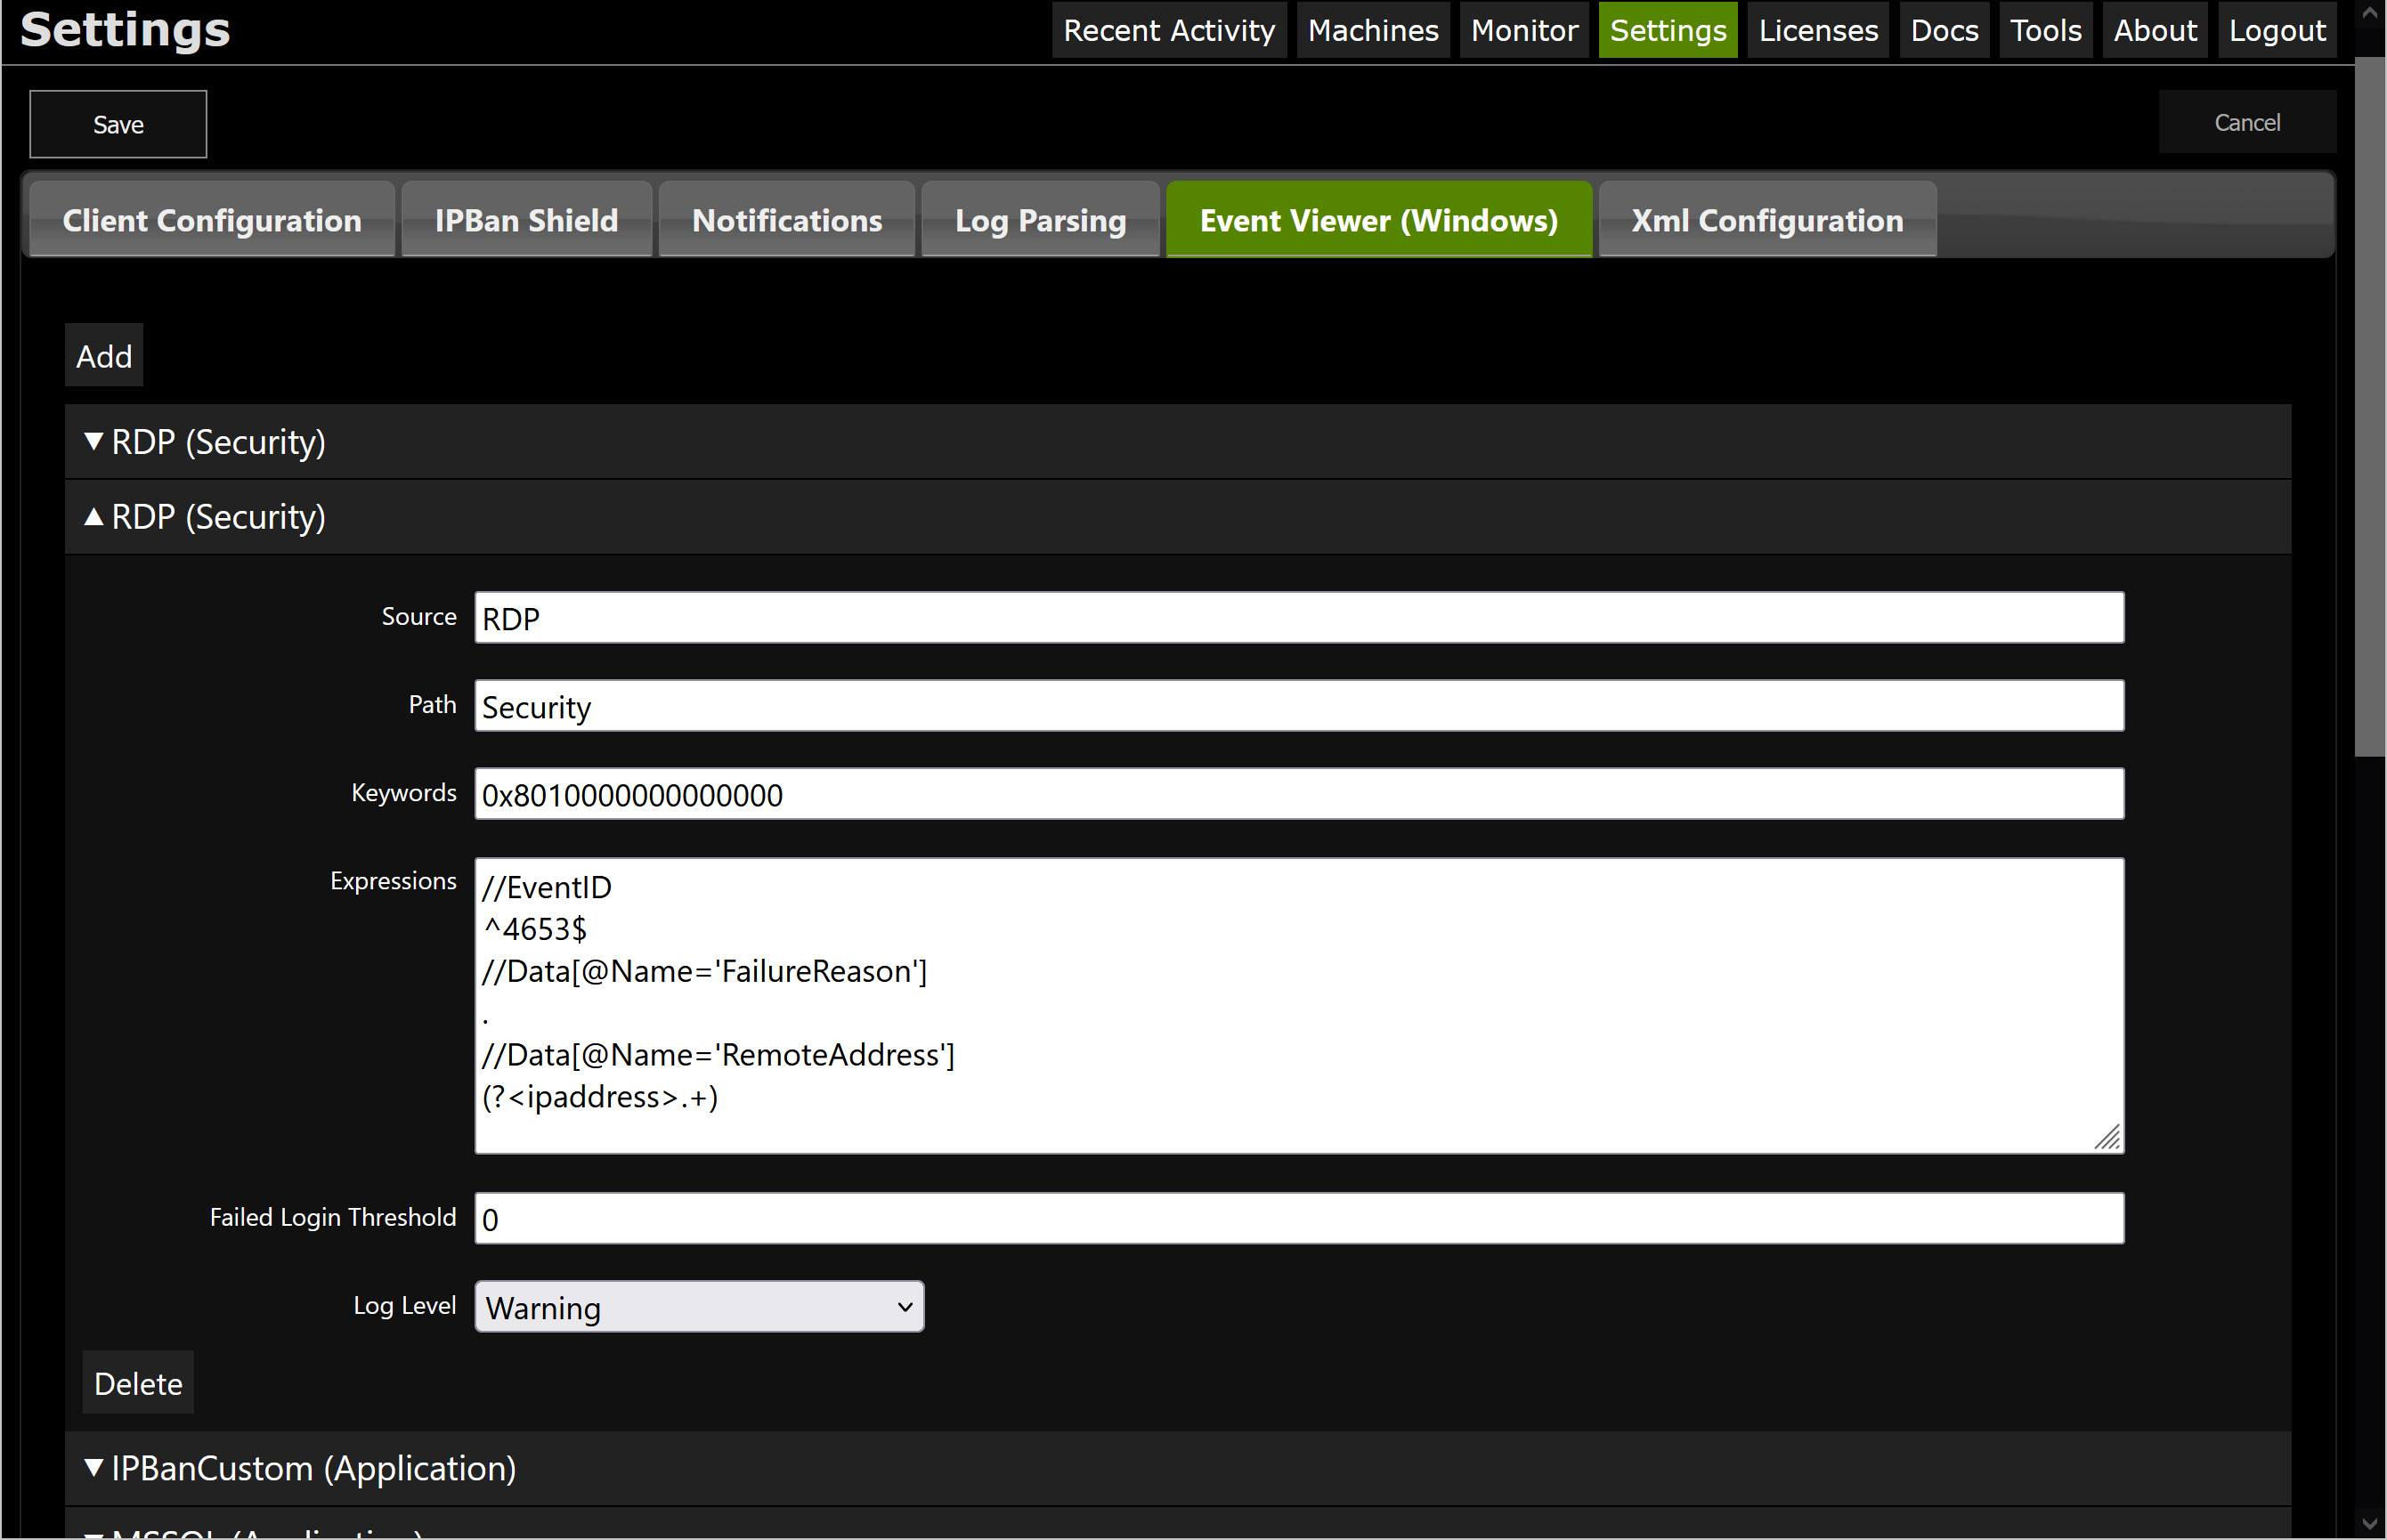
Windows Event Viewer Parsing
Windows event viewer parsing can be configured and works just like in the free IPBan version. See the ExpressionsToBlock and ExpressionsToNotify elements.
XML Configuration
You can view or even edit the raw XML configuration on this settings tab. Be careful as any XML changes will have priority over any changes to the other tabs.
Monitor
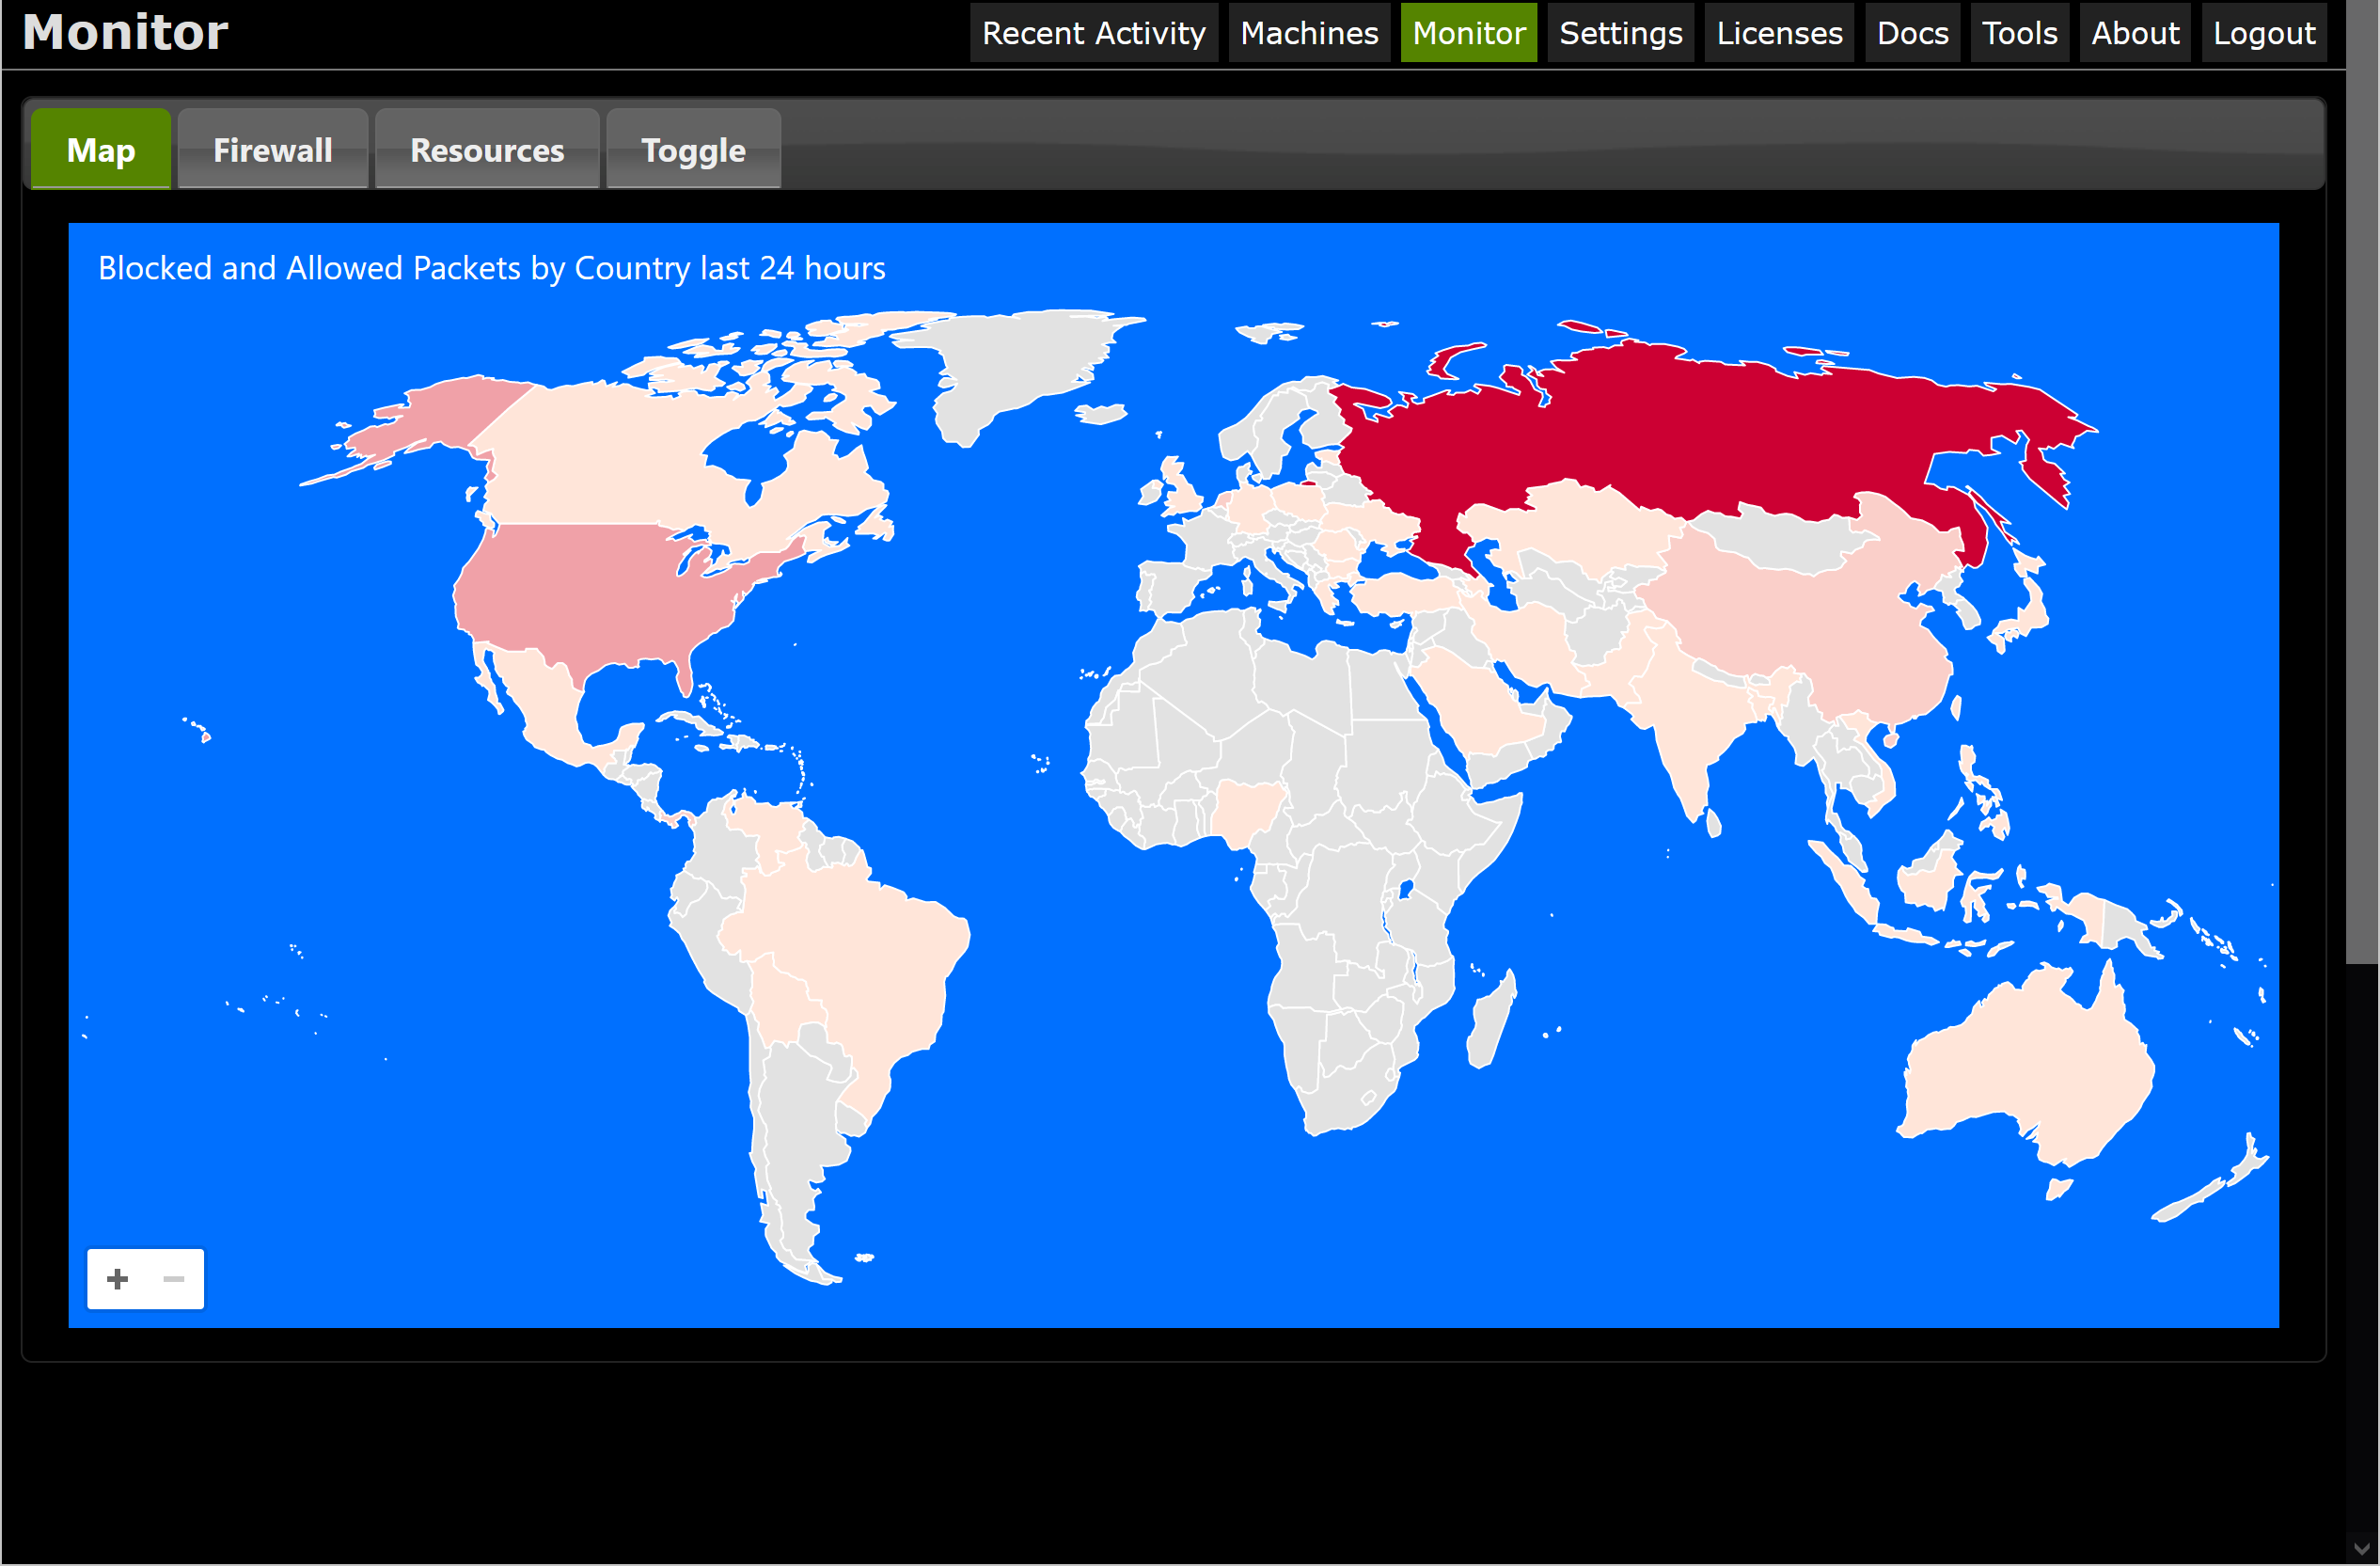
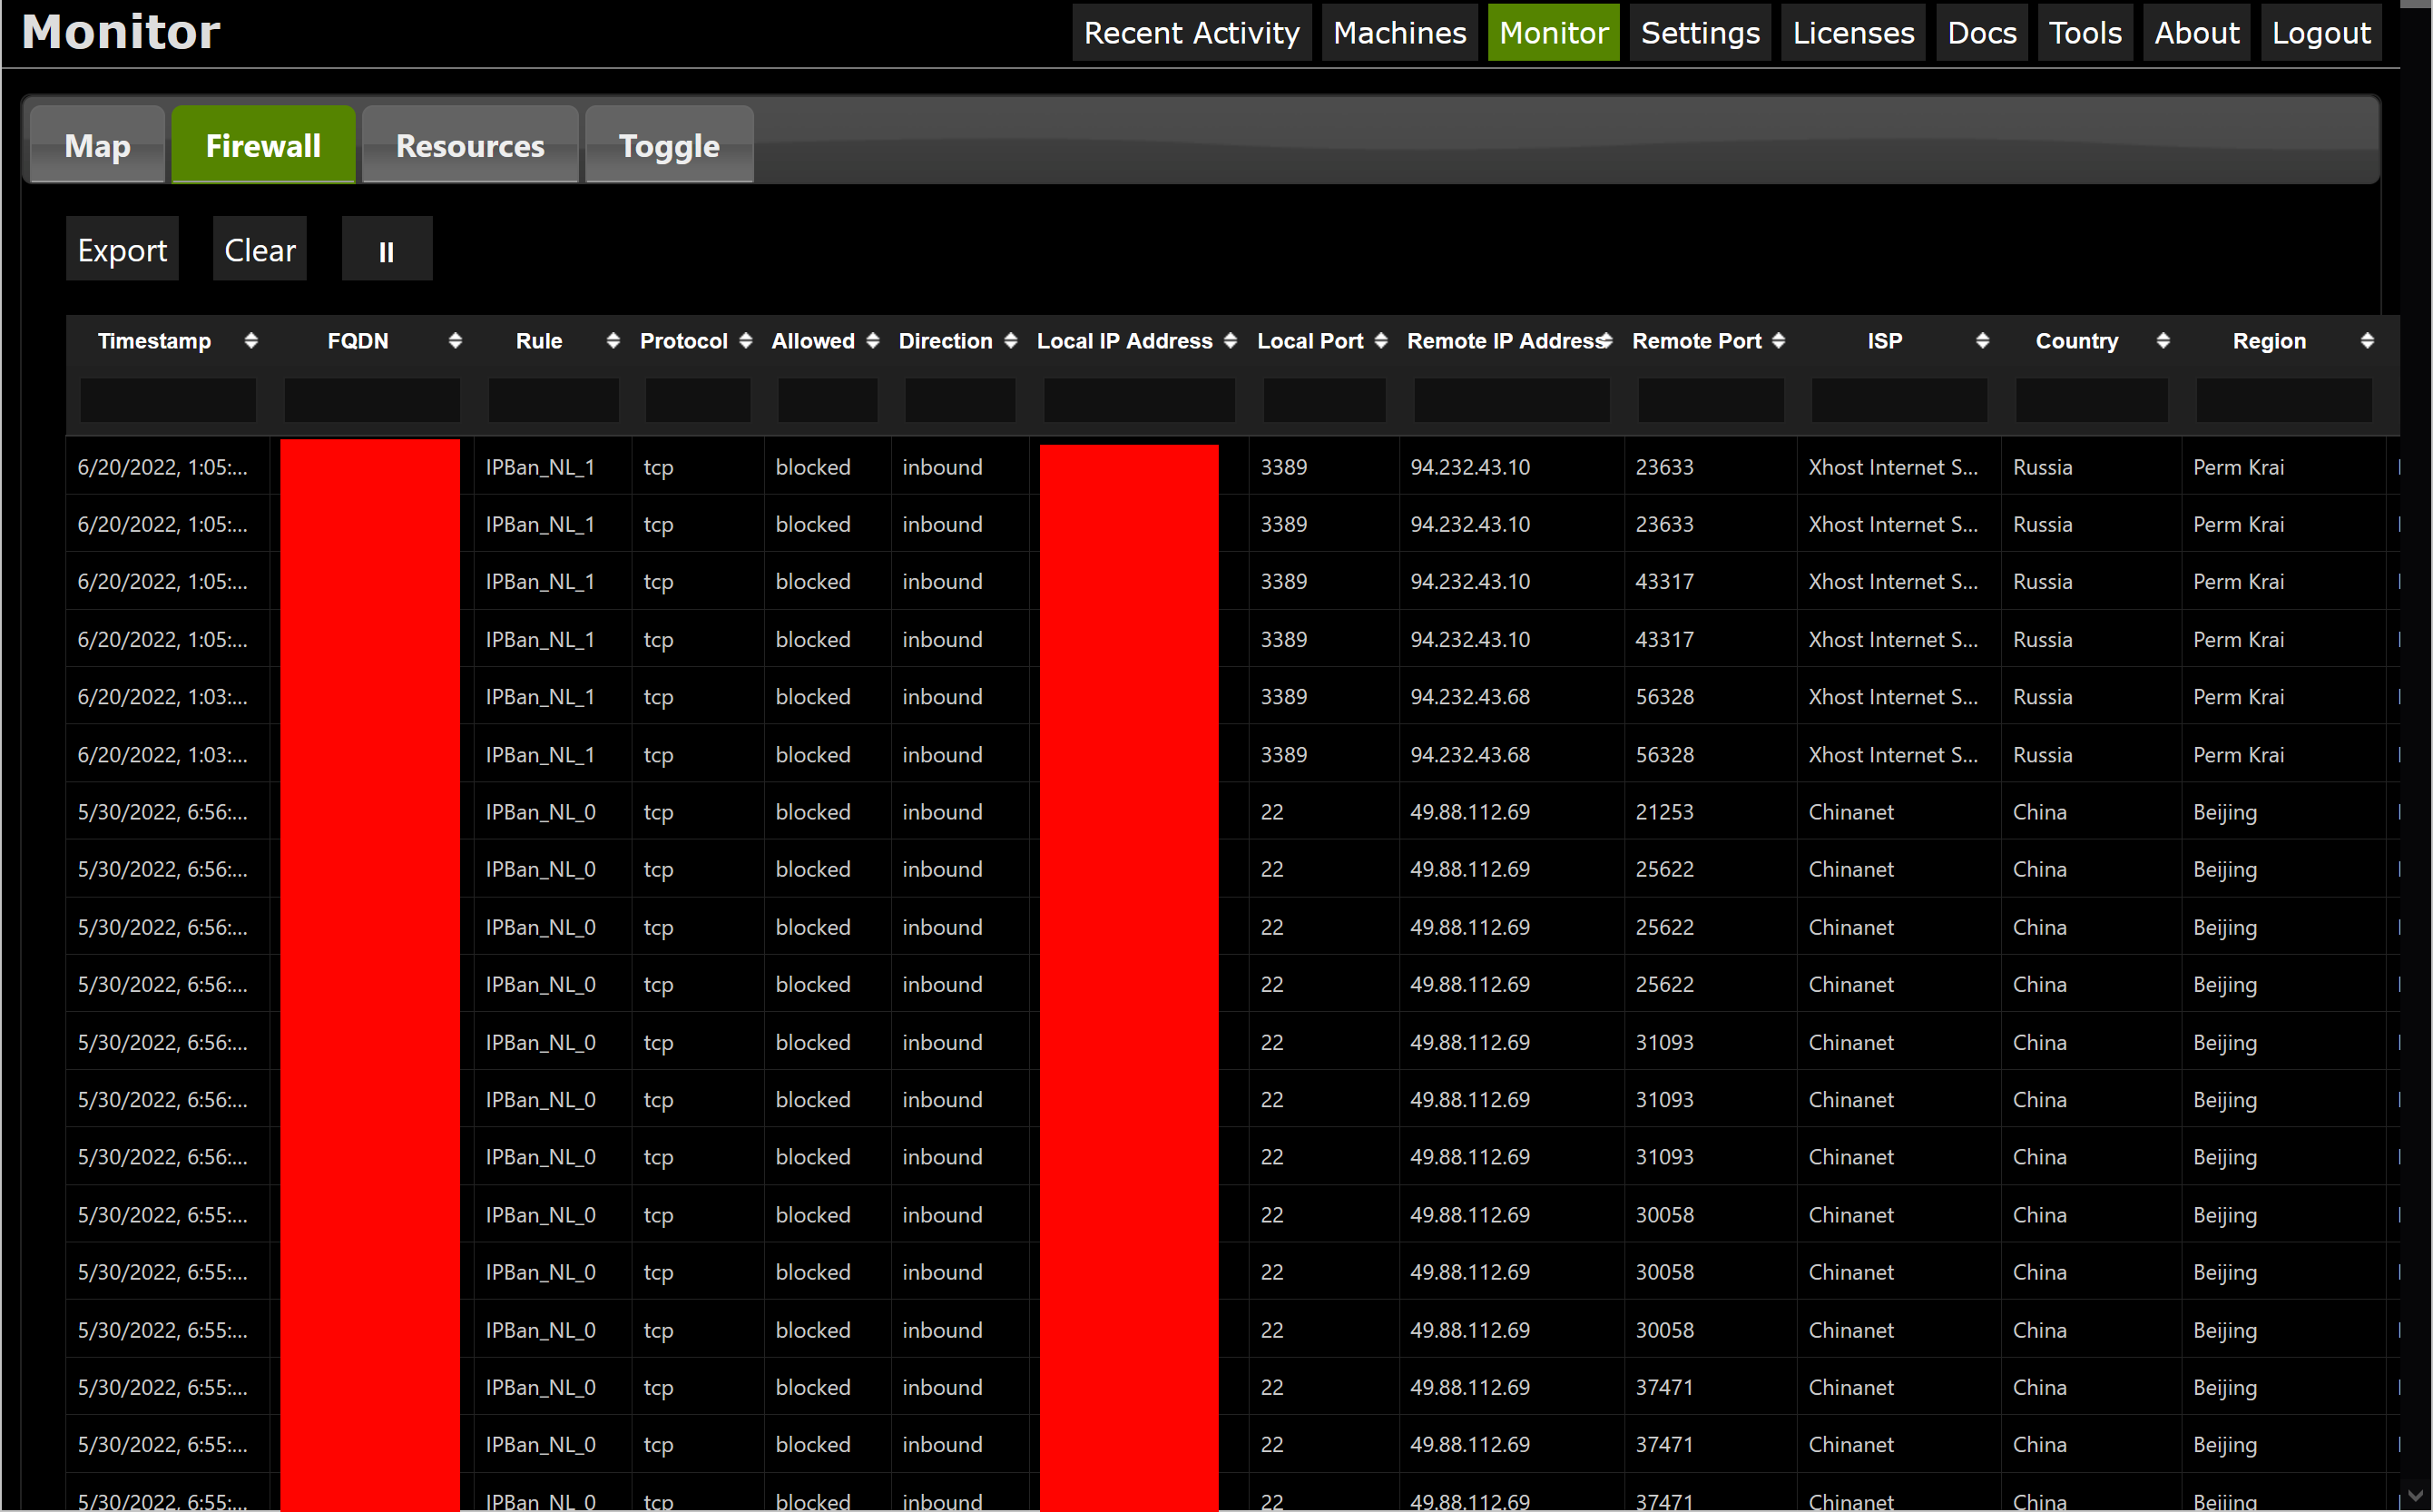
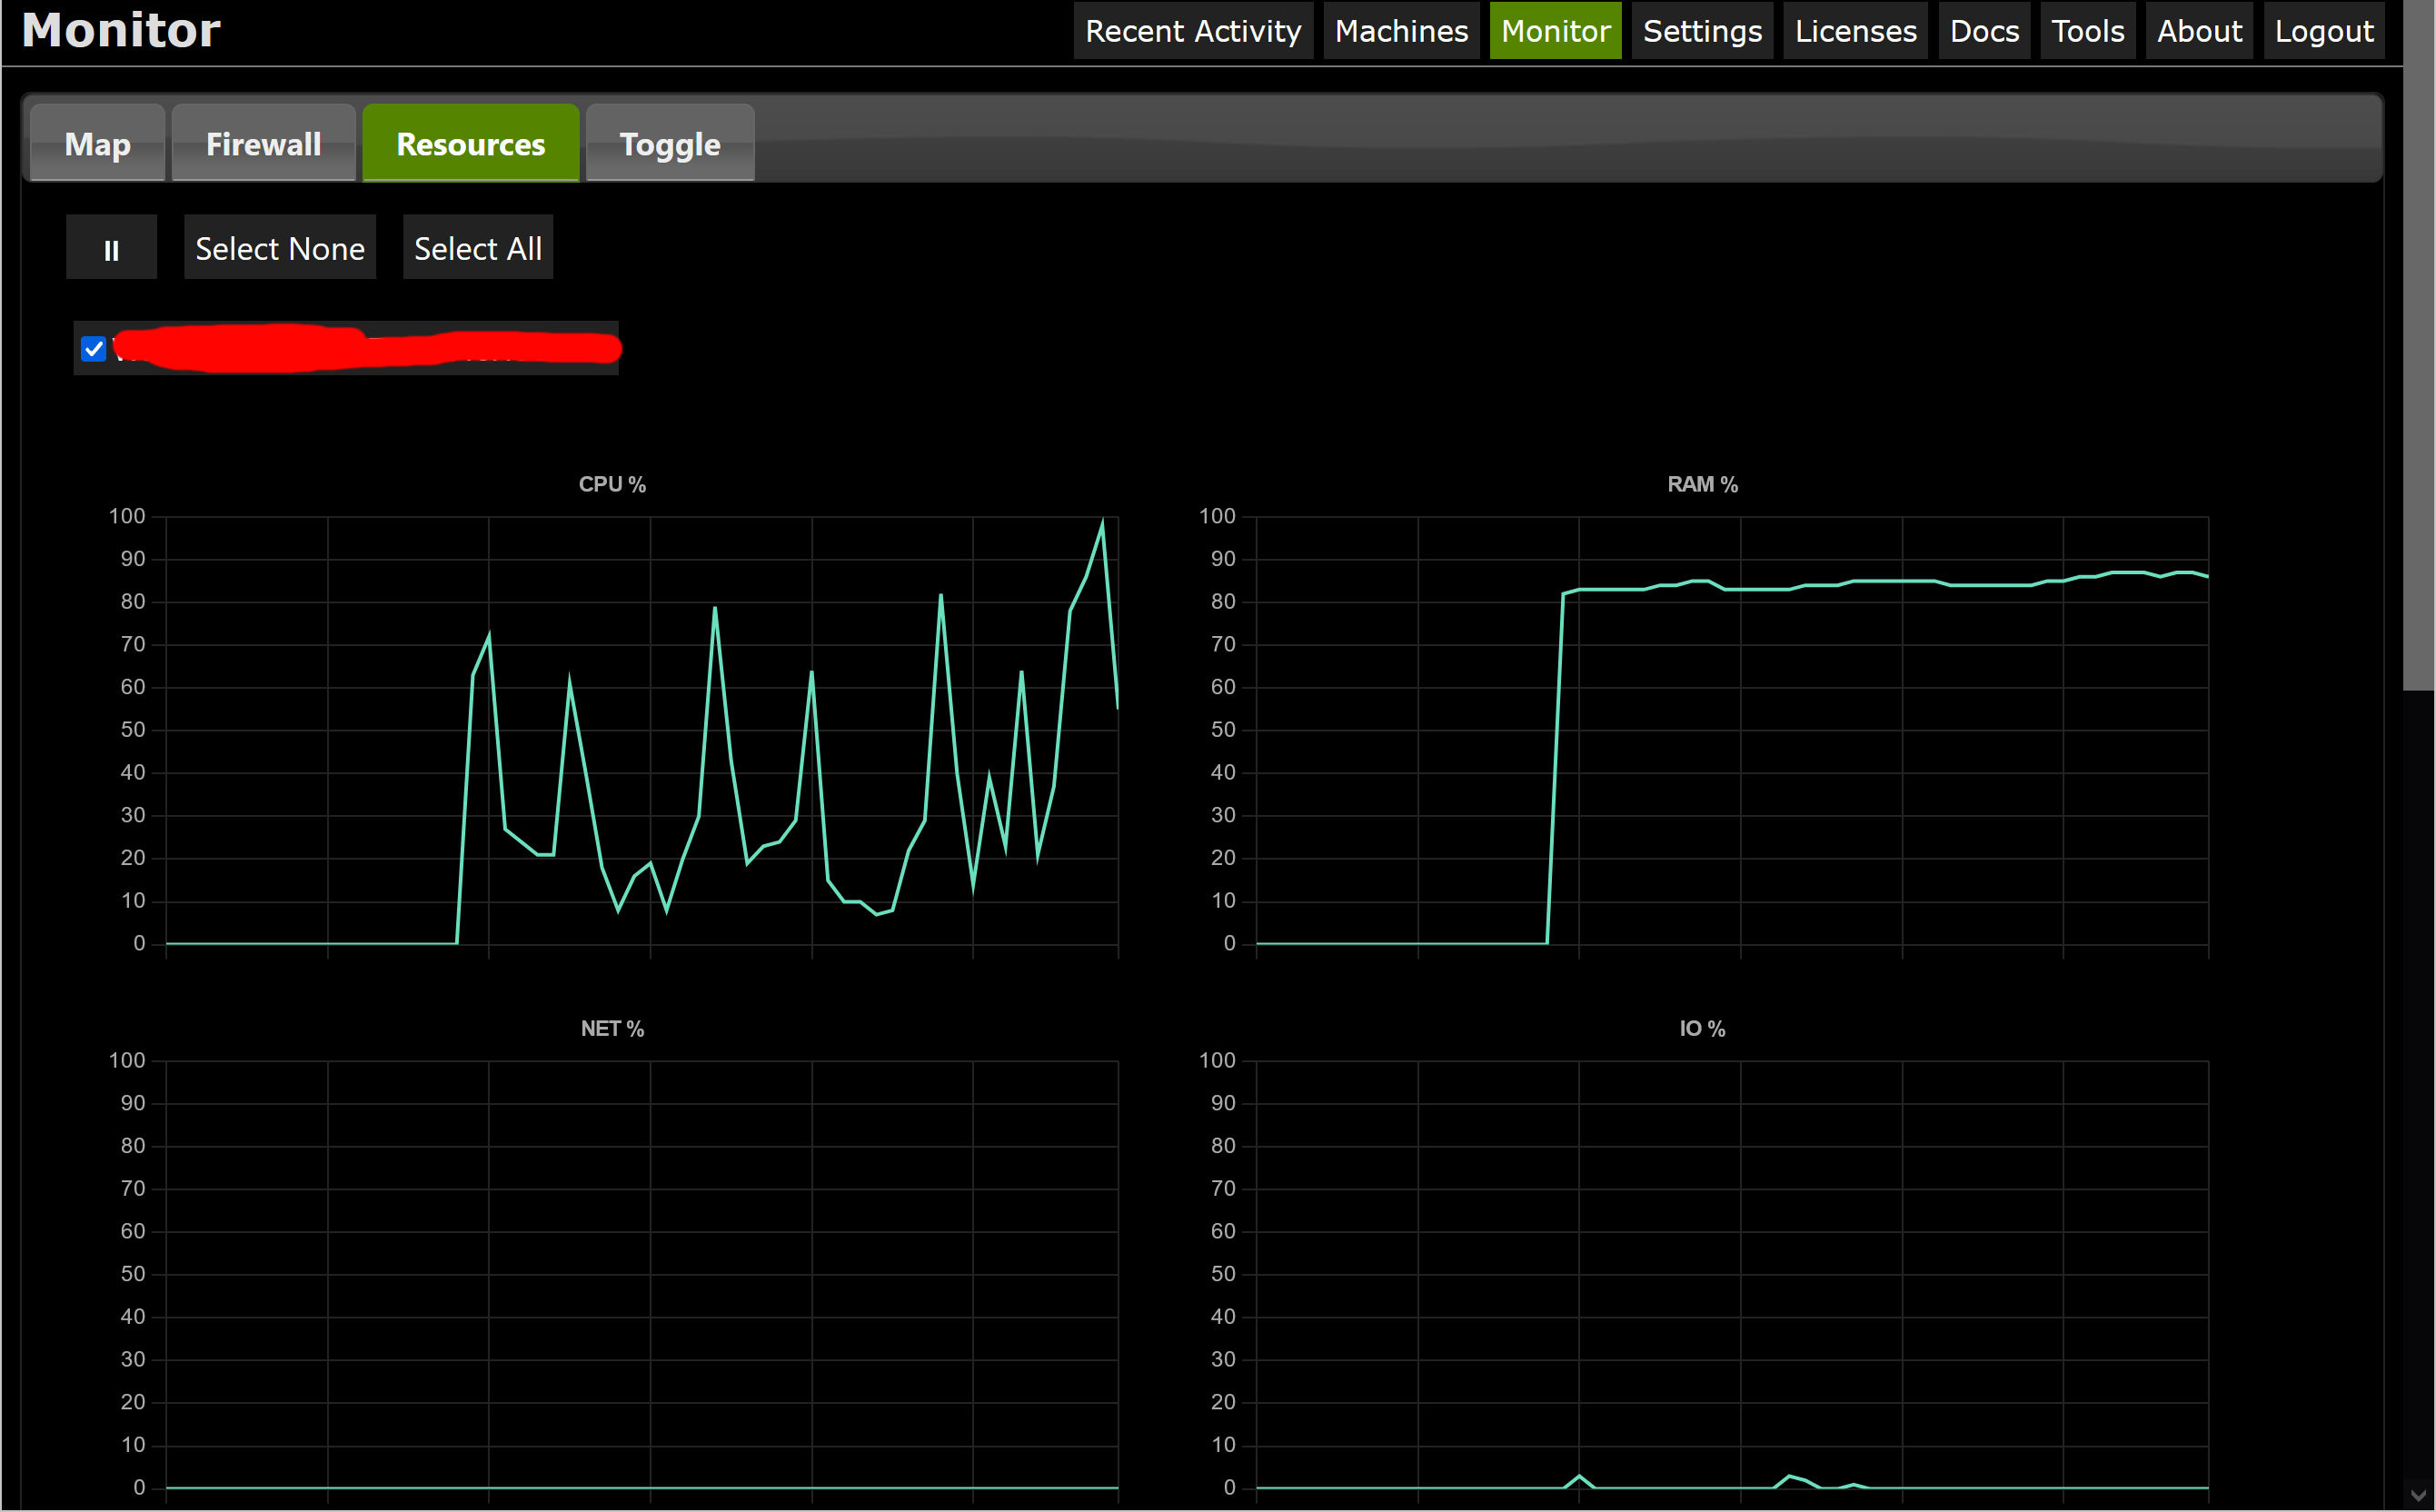
From the monitor page you can view firewall packets by country or by a real-time stream. You can also view system resources of all your machines. You can use the pause/play button to stop the stream temporarily so you can inspect the data.
Using the toggle tab, you can determine which machines will send firewall packets to the web admin utility. If you have many machines, it can be useful to monitor only a few at a time so as not to be overwhelmed by the amount of data.
Your machines will always send resource usage (CPU, RAM, etc.) to the web admin utility about once a second.
Customizing the CSS or JS
You may place a custom.css and/or custom.js file in the root of the web admin folder. These files will be rendered in a style or script tag for every page in the web admin, allowing you to control the appearance and behavior.
The file appsettings.json contains additional settings that control query parameters, how long data persists, etc. This file is persisted between installs.
