
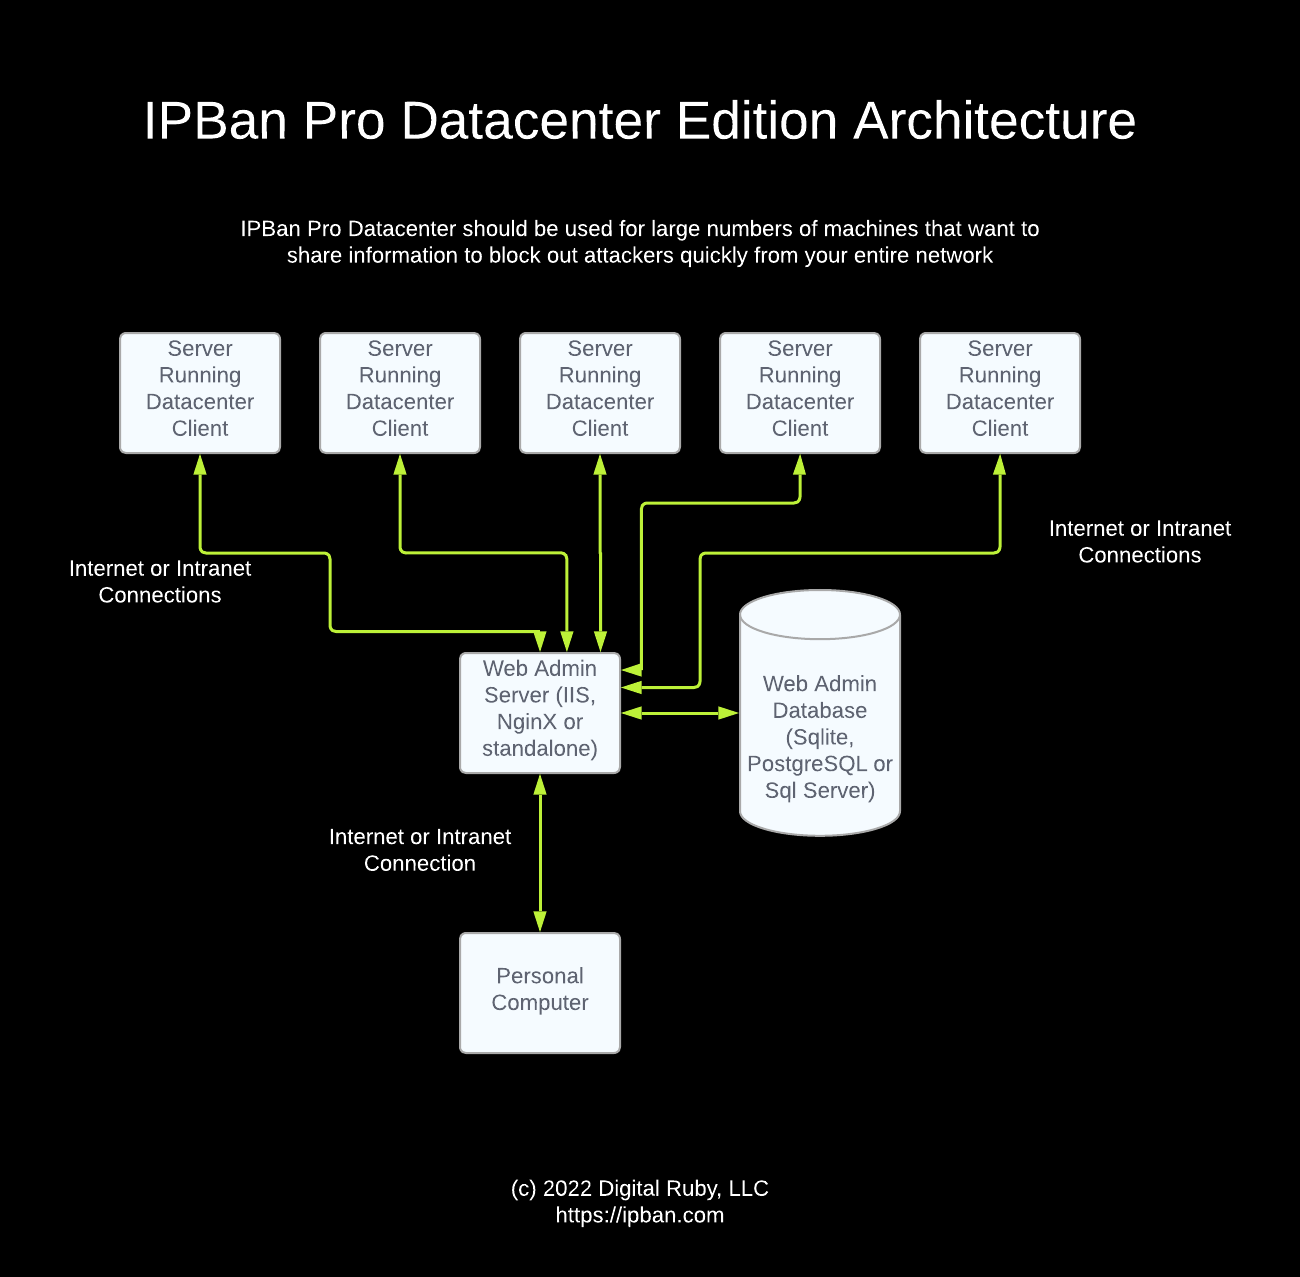
IPBan Pro Web Admin Server is required when running IPBan Pro Datacenter Clients.
The following architecture diagram may be helpful for you to understand how the web admin server and clients interact:
The first step is to unzip the web admin installer somewhere to your computer. On Linux, you need to chmod +x install.sh. On Windows, you need to right click the install.bat file and select properties and then select the unblock option if it is available.
If you are running Windows and using IIS, please install IIS before proceeding with the web admin installer.
Next, run install.bat (Windows) or install.sh (Linux).
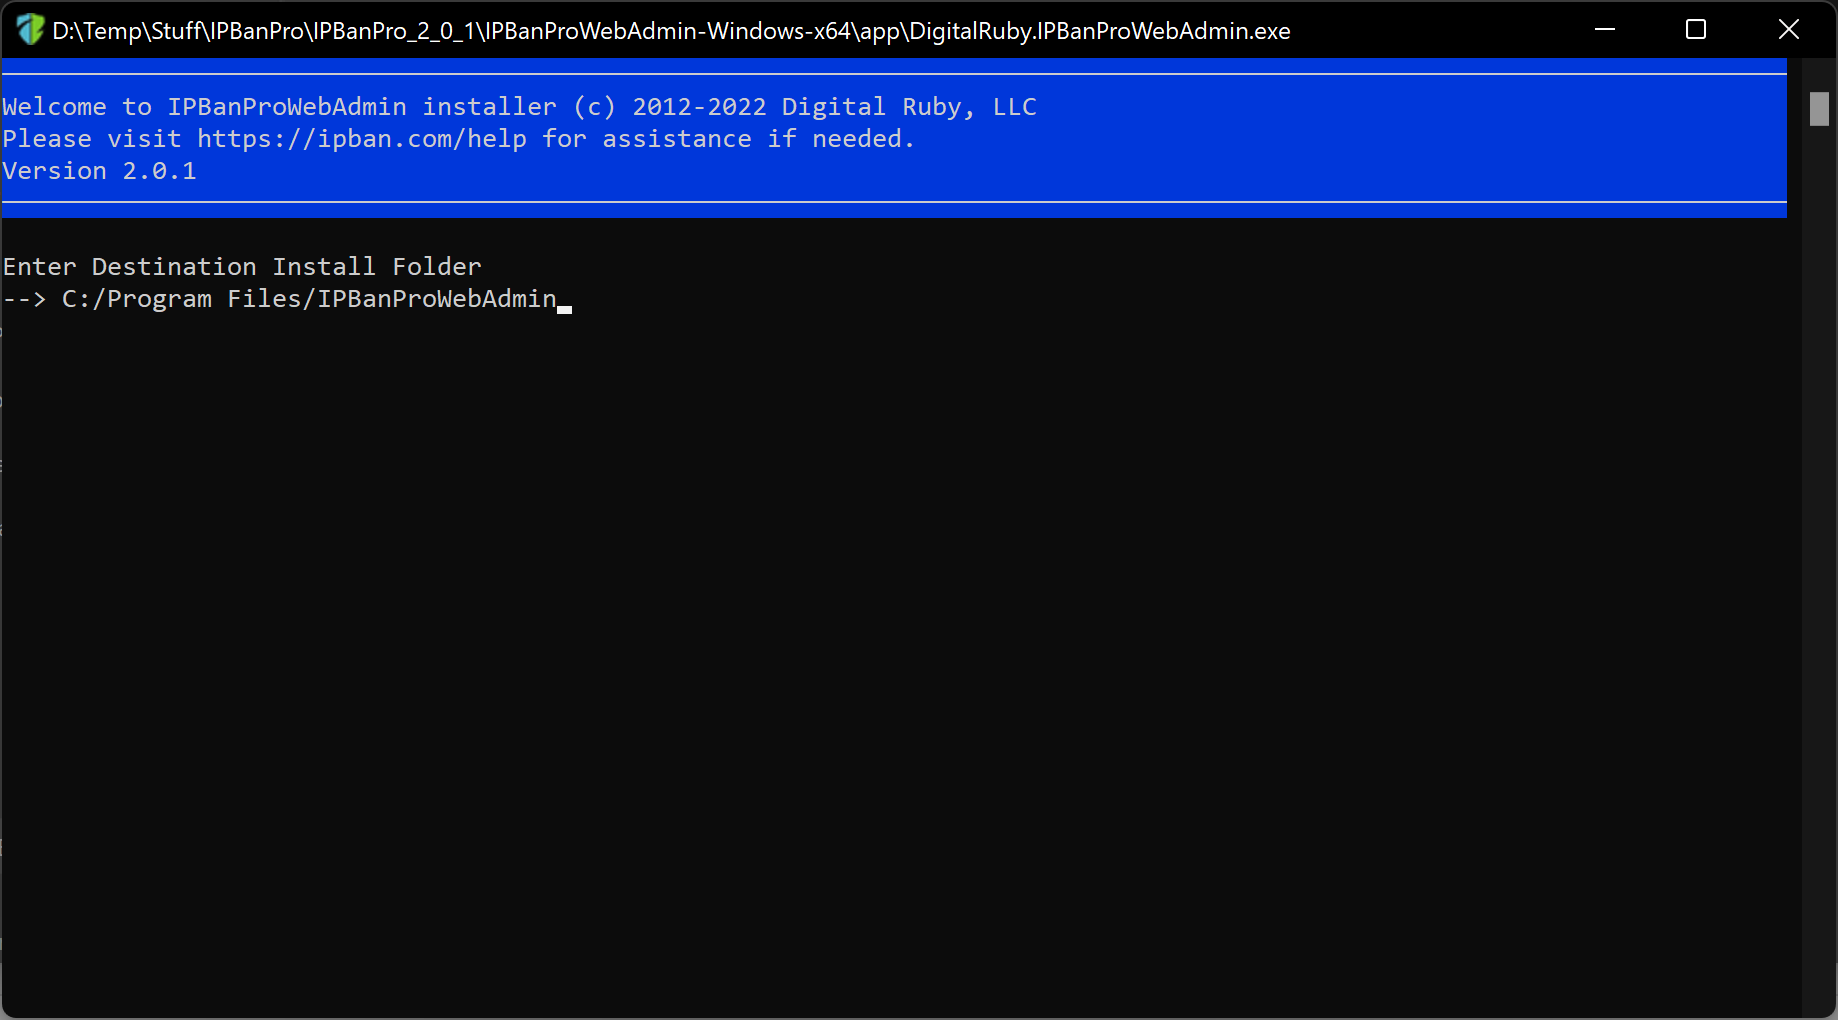
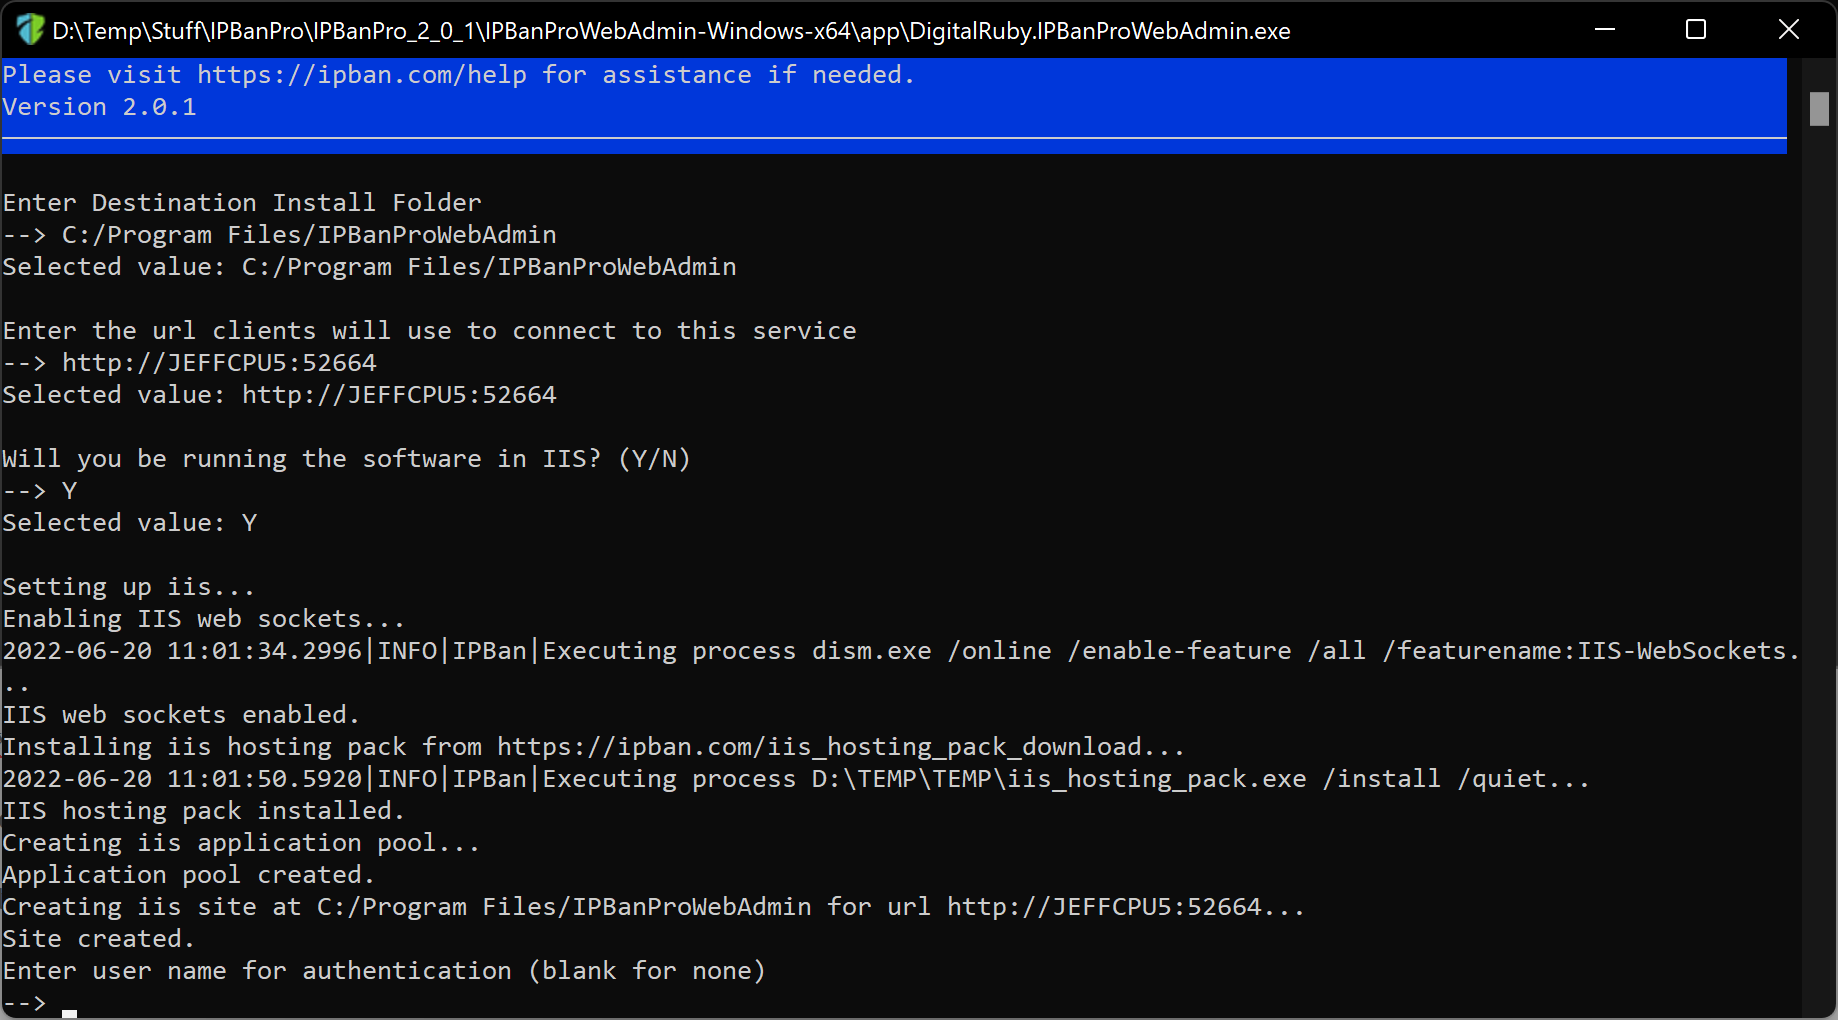
Keeping the default folder is recommended, but you can change this if desired. Press ENTER to move to the next step.
The next step will ask for the url that will be used to connect the clients. This url is also used by your personal computer for you to view activity and configure settings.
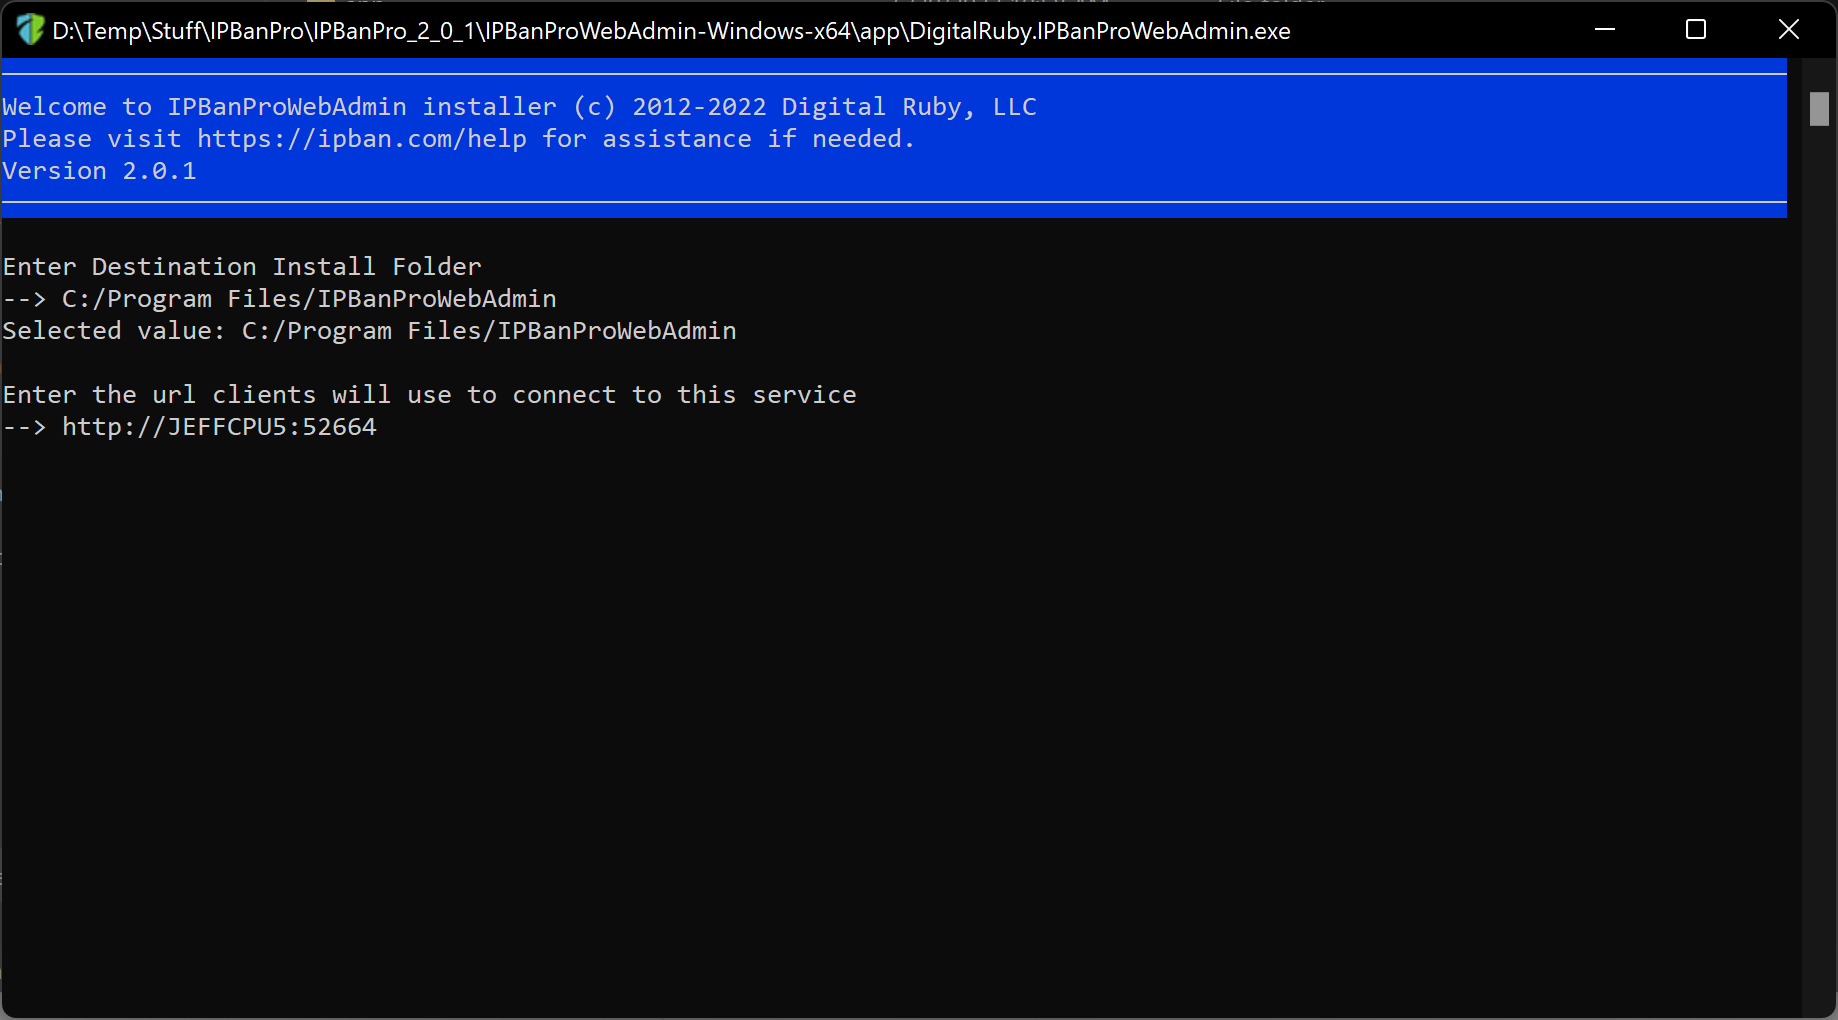
The default will be your machine name, but you can change this to an ip address, i.e. https://x.x.x.x. You can also use a custom port, i.e. https://x.x.x.x:9999. Whatever url you use, this machine must be visible to every client. Using a dns name is highly recommended, in case you ever decide to move your web admin server to another machine, you can simply point the dns to a new ip address and the clients will be none the wiser.
If you want to use SSL, your url must start with https://
For SSL, letsencrypt is a great option and has free to use packages on both Windows and Linux.
– Let’s encrypt instructions for Linux/Nginx
– Let’s encrypt instructions for Windows/IIS
If you are using nginx or iis, you’ll need to complete the installer, then edit the bindings for the newly created website to use the ssl certificate from lets encrypt.
When you install your IPBan Pro Datacenter Clients, you must enter the same exact url when asked for it.
Press ENTER to move to the next step.
For Linux, this will ask if you are using Nginx.
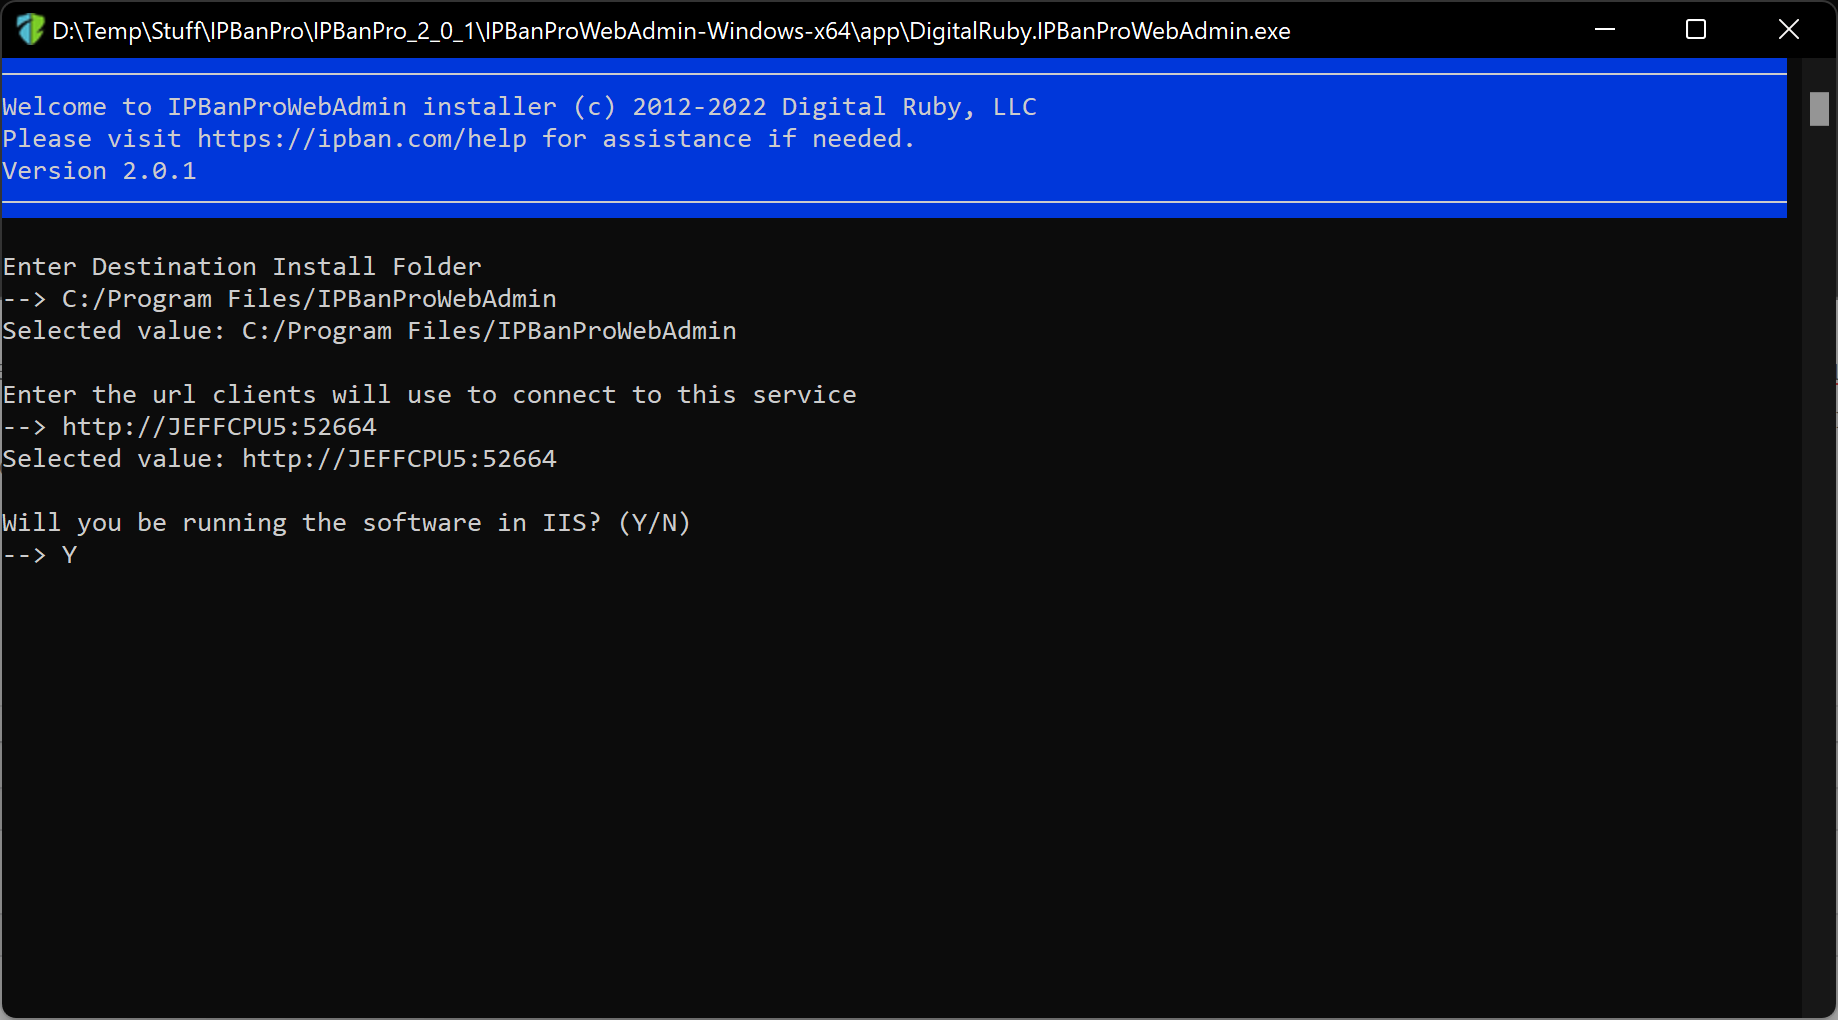
For most cases, using iis/nginx is recommended as it makes using ssl certificates with letsencrypt much easier.
If you decide to use iis (Windows only), additional components will install:
For non-iis or Linux, the above screen will not show.
Finally, you will be asked for a user name and password. This will be your admin account, and will be the same user/password that you must enter when installing each IPBan Pro Datacenter Client.

After entering your username/password, the installer will ask you if you are ready to proceed. Press ENTER and the application will install.
To update the web admin server, visit your My Account page and download the latest version and install again exactly as you did here. Enter the same folder and then you will be presented with an update option. Select the update option and the web admin server will update.
Should you desire to uninstall, you can run the install file again, select the same folder as before and then choose the uninstall or remove option when presented with it. On Windows you can also use control panel, add/remove programs. If the application does not disappear, run the uninstall option again from control panel and it will be removed.
The database will be sqlite by default. If you desire to use postgresql or sql server, edit the appsettings.json in the root install folder and change your database type and connection string for your database. For postgresql or sql server, you must create the initial database, and then restart the web admin site/service and it will auto-create all the tables.
As of the 4.0.0 version, you can use Azure SSO.
Running on Linux? Increase your max file handles per process.
Please email [email protected] if you have questions, feedback or for anything else.
